As a content marketer, you’ll need to constantly come up with content ideas to build, maintain, and grow your audience. This article will give you a couple of tips and tools to help you brainstorm great content ideas for your website or channel.
Use Google Intentionally
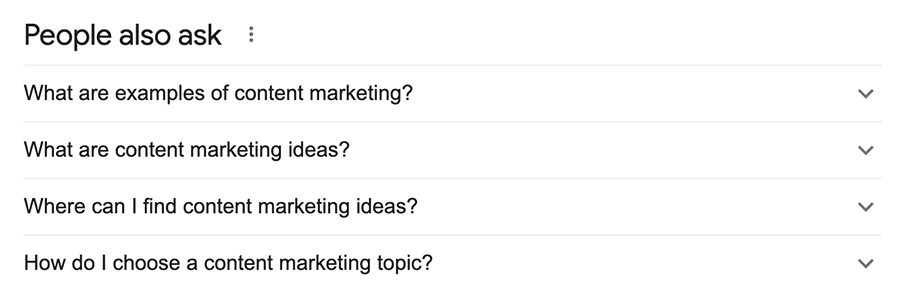
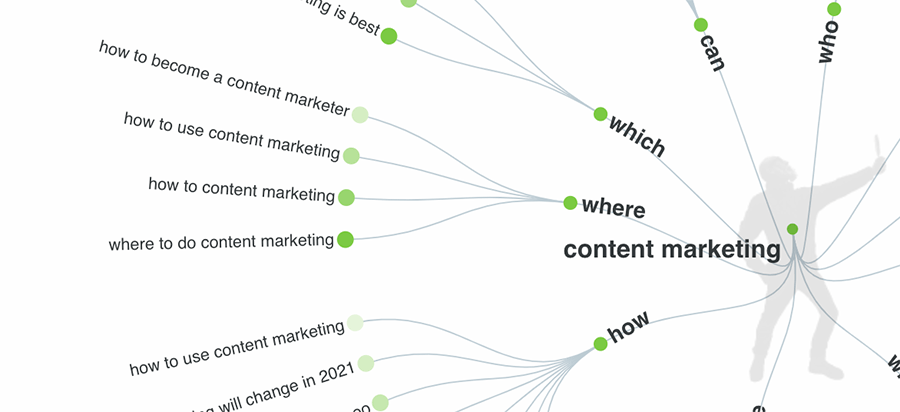
When doing Google research to find content ideas, always pay attention to the “People Also Ask” section in the search results. This might give you a new or different direction for your content.
People Always Ask example within a Google search for “Content Marketing”
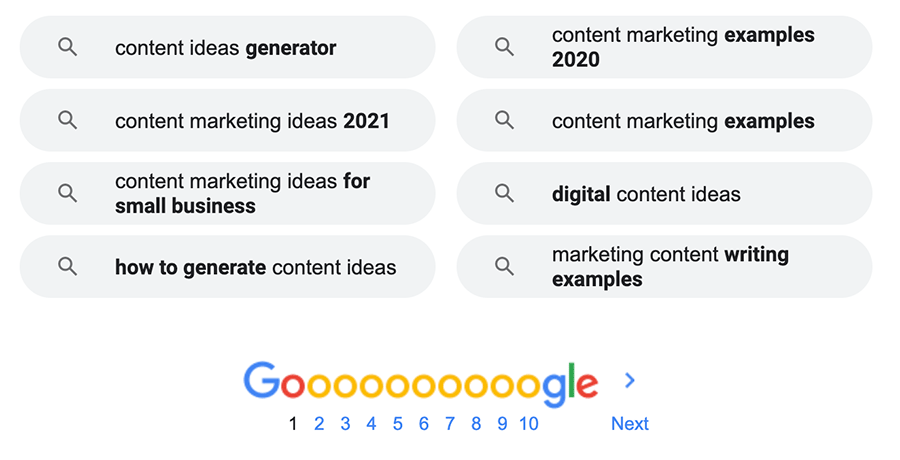
Also, don’t forget about the “related searches” at the bottom of each Search Engine Results Page (SERP). Google uses its historical search data to give related searches that might be more specific than your original idea. Being specific is generally a very good thing – as it allows you to create more focused content that may stand a better chance of being ranked.
“Related Searches” example from Google search for “Content Marketing”
These will often give you very relevant and specific ideas for content that Google users are searching for.
Google Trends
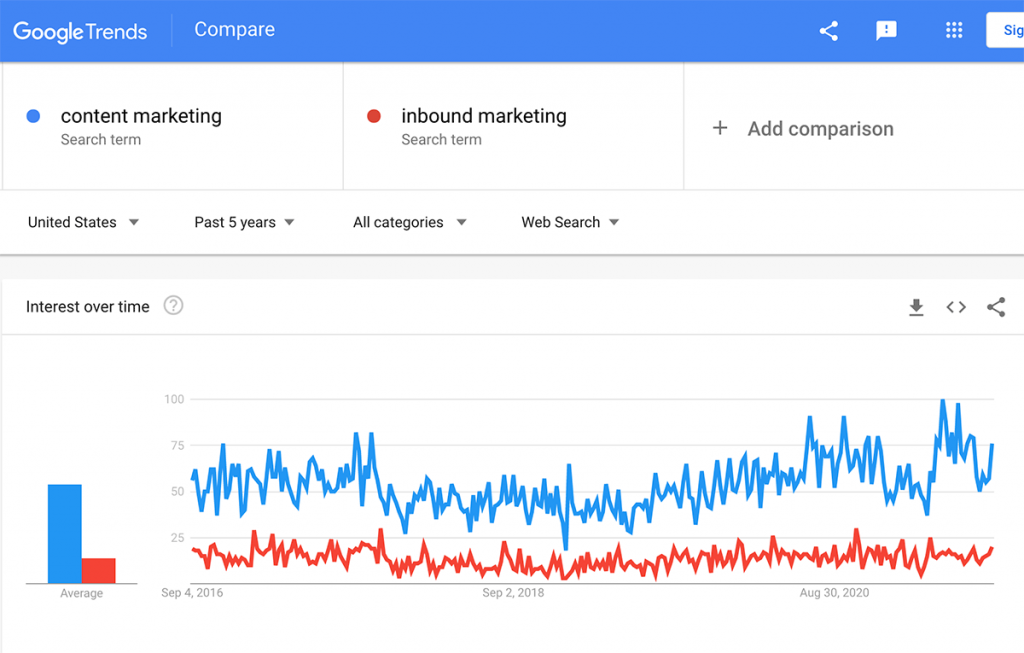
Google Trends will allow you to search historically for terms to see how the search volume has changed over time. This will give you a good idea about what terms to use and which to avoid. You can also compare two different terms to see which is more frequently searched for on Google.
Google Trends results showing comparative search volume between terms “content marketing” and “inbound marketing”
Answer The Public
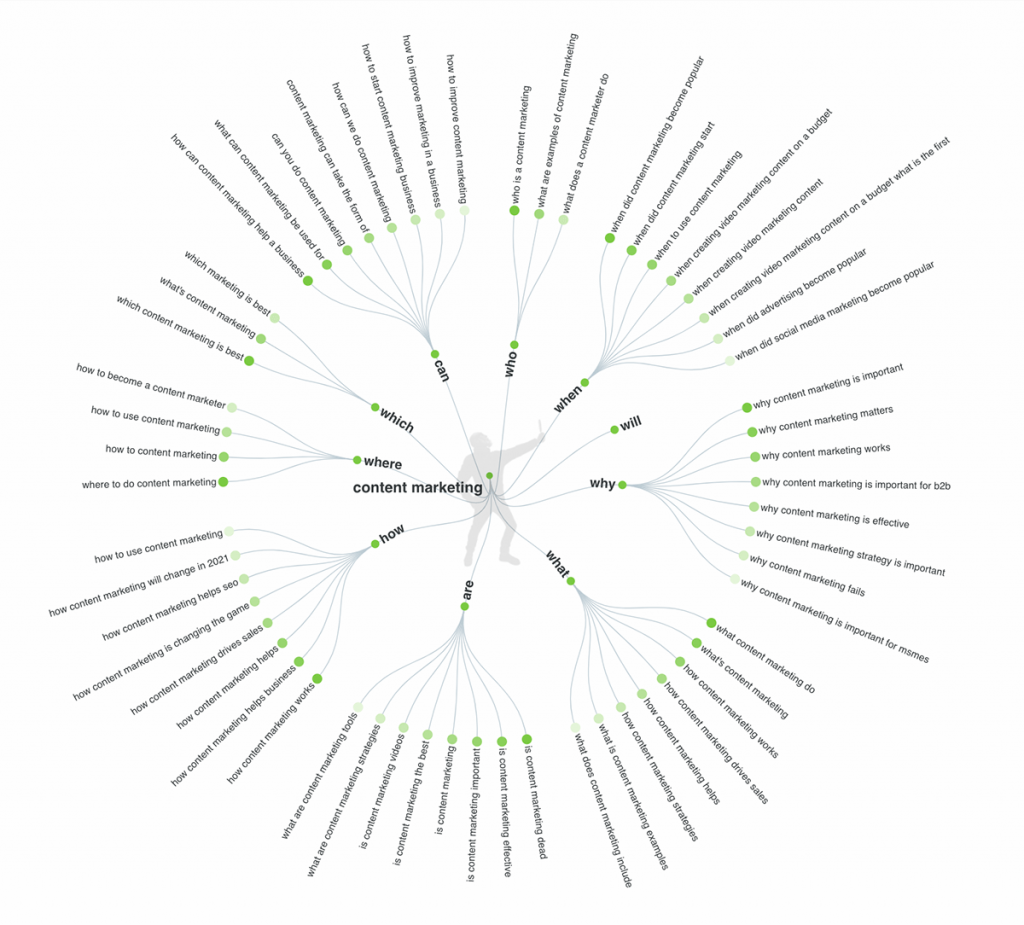
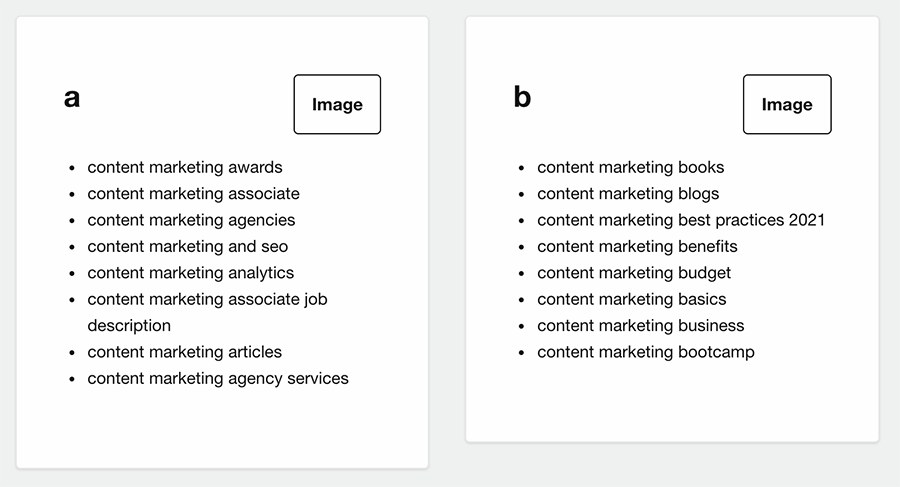
Answer The Public is a site that also uses Google search data – but ATP uses this data to show you questions that Google users ask that are related to your topic.
ATP results: a visualization of related questions
ATP gives you a detailed report with many visualizations related to key questions, prepositions, and comparative words.
It also breaks results alphabetically for another way of brainstorming.
Getting content ideas on Twitter: Trending Topics
Twitter trending topics always can give you a finger on the pulse of what is being talked about right now. Get the most up-to-date and current content ideas by visiting trending topics often.
Getting content ideas on Instagram: the Explore Page
The explore section of Instagram has collections of content that Instagram believes you will be interested in. If content appears on your explore page, chances are good that the content is popular among others like you.
Now that you have spent a semester working hard to create content marketing content on your branded website, you will want to archive your WordPress content for future reference.
Why Archive Your WordPress Content?
There are many reasons to archive your WordPress site and its contents. The top three are:
1. Use in your Portfolio
Many employers hiring for content marketing positions will ask for work samples or writing samples to show that you can create content. This is a good reason to spellcheck your posts, as typos in your portfolio content are a definite dealbreaker for employers!
2. Indulge your Inner Archivist
If you’re the type that likes to save and archive your creative efforts – having these saved in a format you can easily view in the future will give you great satisfaction.
3. Keep your Personal Brand Active
Some of you may even want to transfer your WordPress content to a new server with your own domain name that will allow you to keep your site going into the future.
Methods to Use to Archive Your WordPress Posts
Take “full page” screenshots
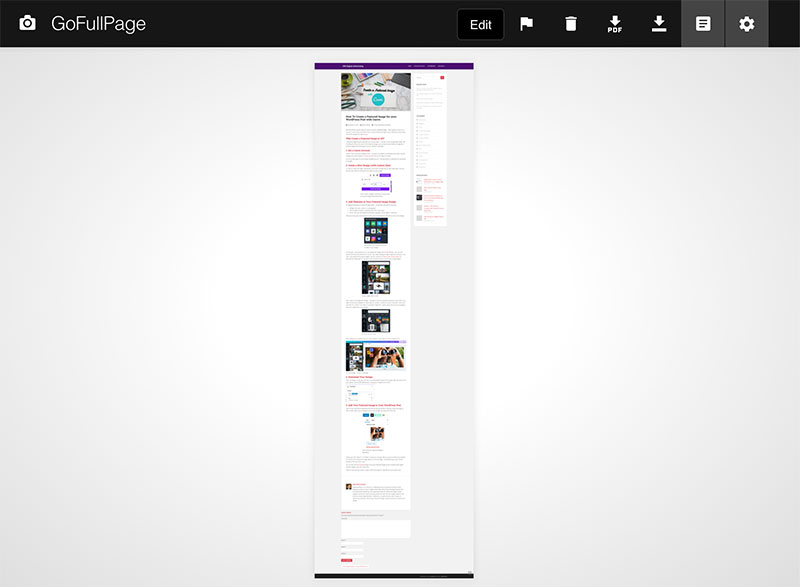
Use a Chrome extension like GoFullPage to take large screenshots of your entire posts. Then download and save as large PNG image files or PDF files.
A WordPress post after capturing with GoFullPage.
Saving your content as large image files or PDFs will give you lots of flexibility – however it should be noted that if you were to ever need the text / copy of your posts, saving as an image format will not allow you to select or copy the text itself.
Print Your Pages and Posts as PDF Files
PDF files are ubiquitous – everyone can view them regardless of the operating system they use. PDFs can also be easily printed
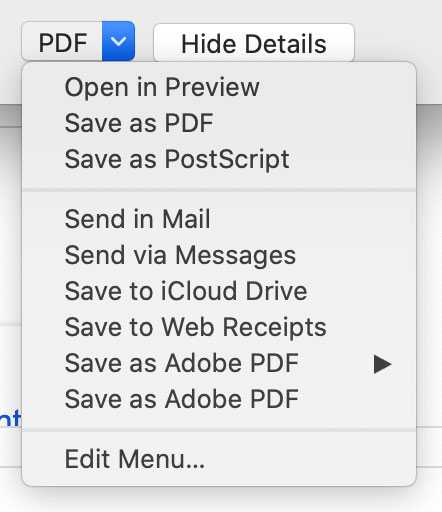
Most browsers and systems allow users to print webpages directly to PDF files using the “Print” command.
On Macs, this is as simple as selecting the PRINT command, and going to the drop-down menu at the bottom left of the print dialog box:
The PDF drop-down menu in the Print command dialog box
Transfer Your Entire Site to a WordPress Installation on a New Server
This is the best option, as it preserves the native format of your content, saves your SEO work, and preserves the visual design of your site. It also gives you the option to continue your website into the future!
To do this, follow these instructions on how to export your WordPress site, secure a web hosting plan with your very own custom URL, install WordPress, and import your site to its new home.
Each of you has been provisioned a WordPress installation directory that you can now activate.
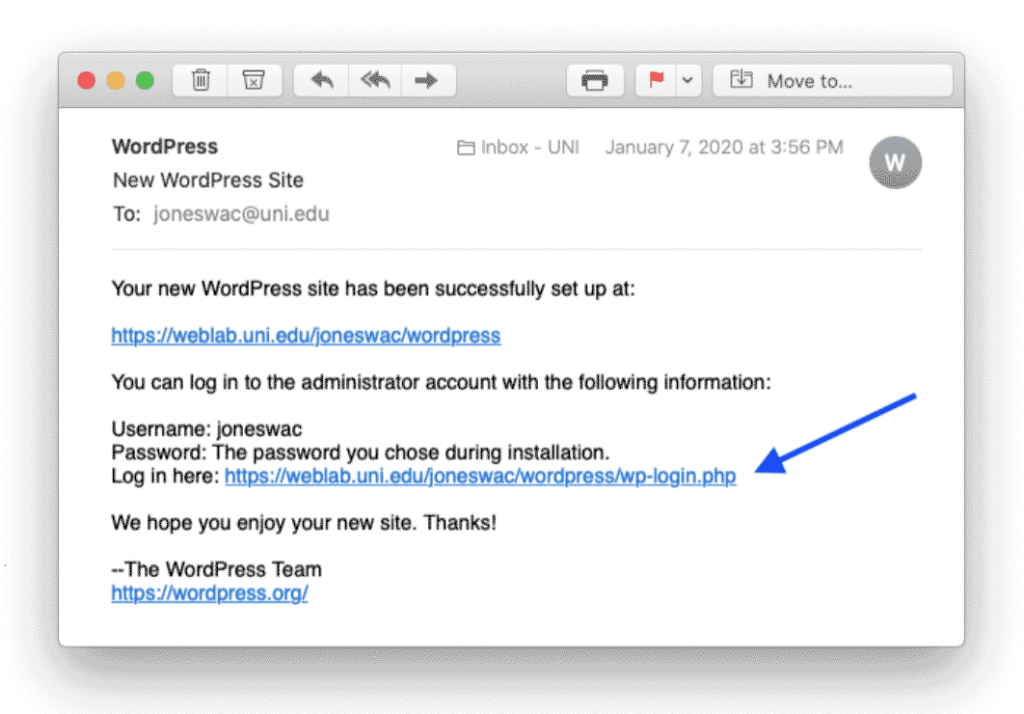
Step one: Find your confirmation email
You should have received an email with the subject line “New WordPress Site” that contains a link to login screen.
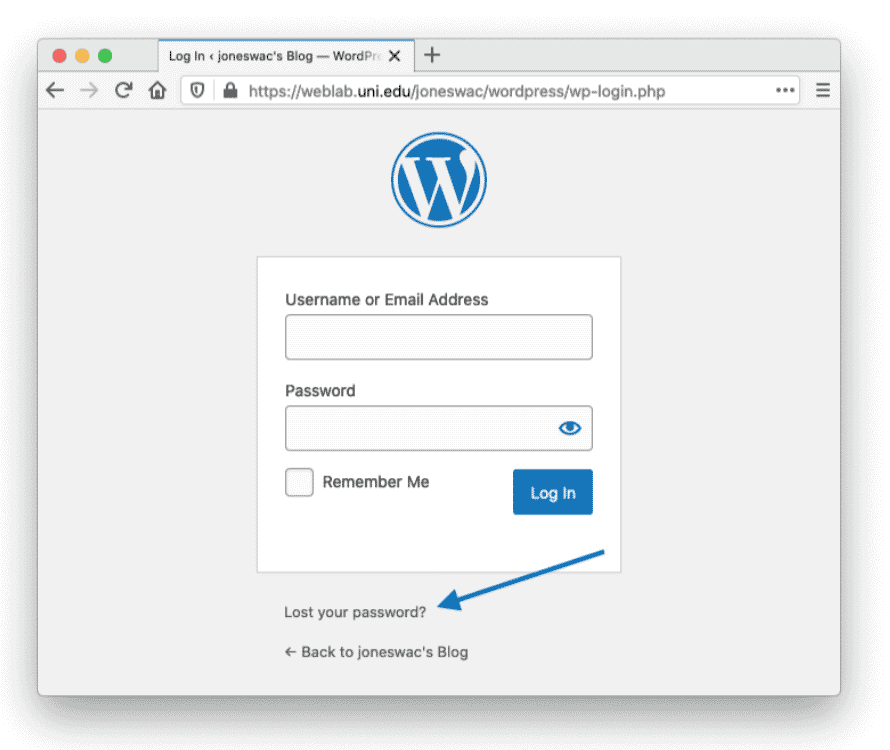
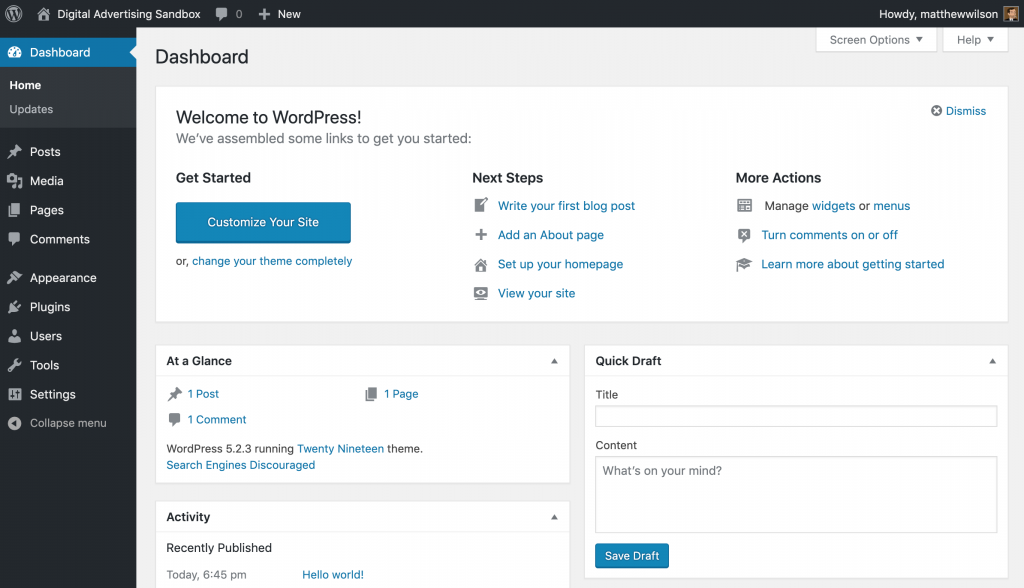
When you click on the “log in here” link, you should see something like this:
On this log-in page, click on “Lost your password?” and fill in your CatID as your username. You will then receive an email link to change your WordPress password.
Once you log in, you’ll need to fill out a short form with your preferred Site Title, Username, Password, and Email address.
Be sure to leave the checkbox “Discourage search engines from indexing this site” UNchecked! We want search engines to index this site!!
Step 3: Celebrate Your Success!
You did it – You’ve installed WordPress!
Click the “Log In” button to continue.
Step 4: Choose a URL
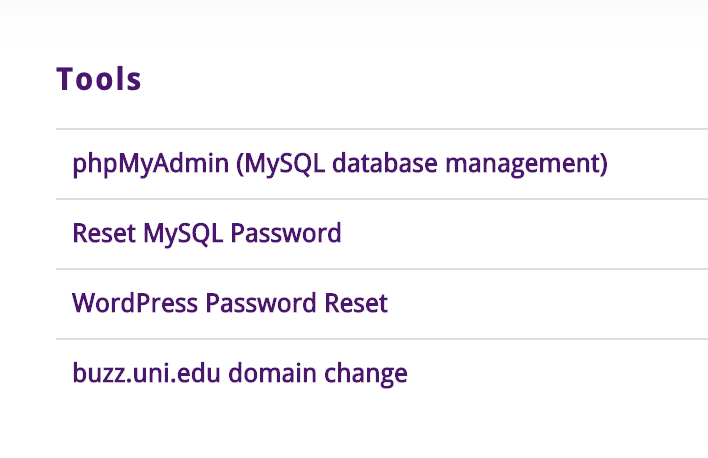
Go to http://weblab.uni.edu/ and sign in with your CatID. You should see a page that shows your website plus a few options on the right hand menu.
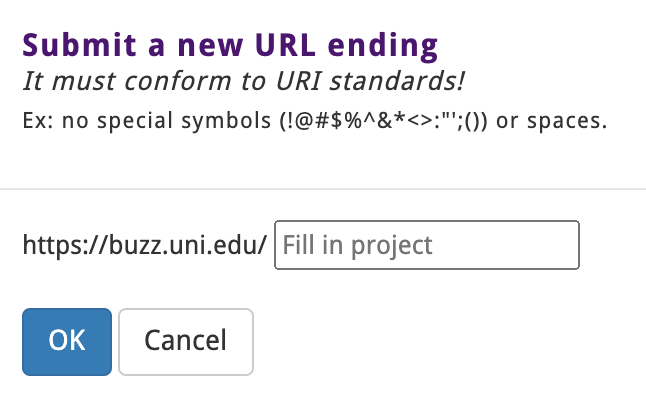
For this class, we’re going to use a specific subdomain called buzz.uni.edu. This will allow us to have a shorter URL and a cooler domain than “We Blab”. You’ll need to choose a URL ending that matches your blog title and personal brand. It should be relatively short – omitting words like “The”, “and”, and “blog”.
This will be your “canonical” URL that you will use to promote your blog.
Step 5: Log In
You can log in by going to your buzz URL and clicking on “log in”. You should see a screen that looks like this:
Akismet is a WordPress plugin that protects you from comment spam. This begs the questions: “What is Comment Spam?” and “Why do you need protecting from it?”
What is Comment Spam?
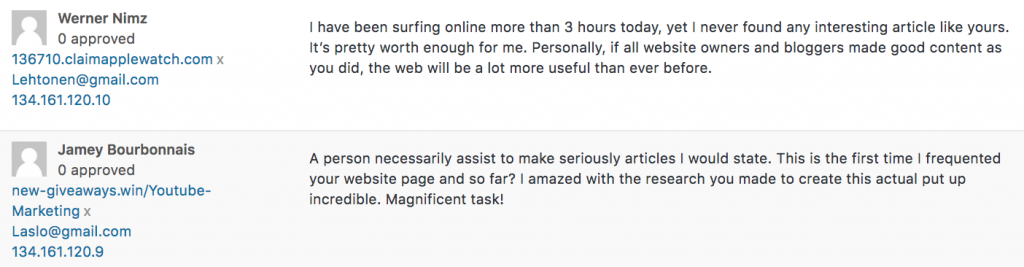
The bane of bloggers everywhere is an incipient form of spam known as comment spam. Comment spammers will post seemingly genuine comments to your blog posts which praise the quality of your blog post.
Seems harmless, right? It sounds like they love your blog! Unfortunately, you’re being played.
Why Spammers Leave Comments
These commenters will include links to sketchy-sounding websites (such as 136710.claimapplewatch.com in the above example) on their commenting profiles. If comments are approved and published, they will provide that sketchy website with a backlink – which is an essential criteria in Google’s famous PageRank algorithm.
The more comments they leave (and which you and other bloggers approve to be published), the higher their sketchy website could rank on Google organic searches. It doesn’t matter to them if no one ever clicks on their link – just the fact that it is published on your site could be enough to generate higher organic rankings – and thus, more organic traffic.
The Real Annoyance
While you can moderate comments to prevent spammy comments from being automatically published, comment moderation can start to take a lot of time. Over time, you might start getting hundreds of comments a weeek – all of which need to be manually moderated. That’s when spammy comments can really start to become a major annoyance.
Manually deleting comments is no fun at all. It takes time away that you could be using to create more awesome content!
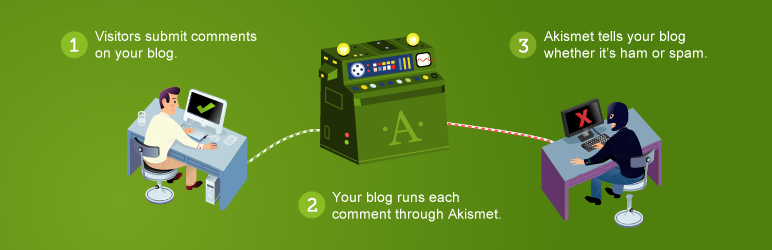
Enter Akismet
Akismet will automatically send obvious comment spam into instant obscurity so you won’t have to give it a second thought. You won’t be bothered by 99.9% of comment spam again – and if Akismet isn’t quite sure whether a comment is spam or not – it will give you the choice and let you decide.
Sound like a good deal? Ok – let’s get it hooked up!
Activate Akismet
Akismet is pre-installed as a plugin for every UNI blog that we’ve created for this class. You’ll just need to activate it by clicking on the blue “Activate” link in your Plugins directory.
Once you activate the Akismet plugin, you’ll need to set up your account. This is a little tricky, so follow along closely!
Log in to Akismet using Google
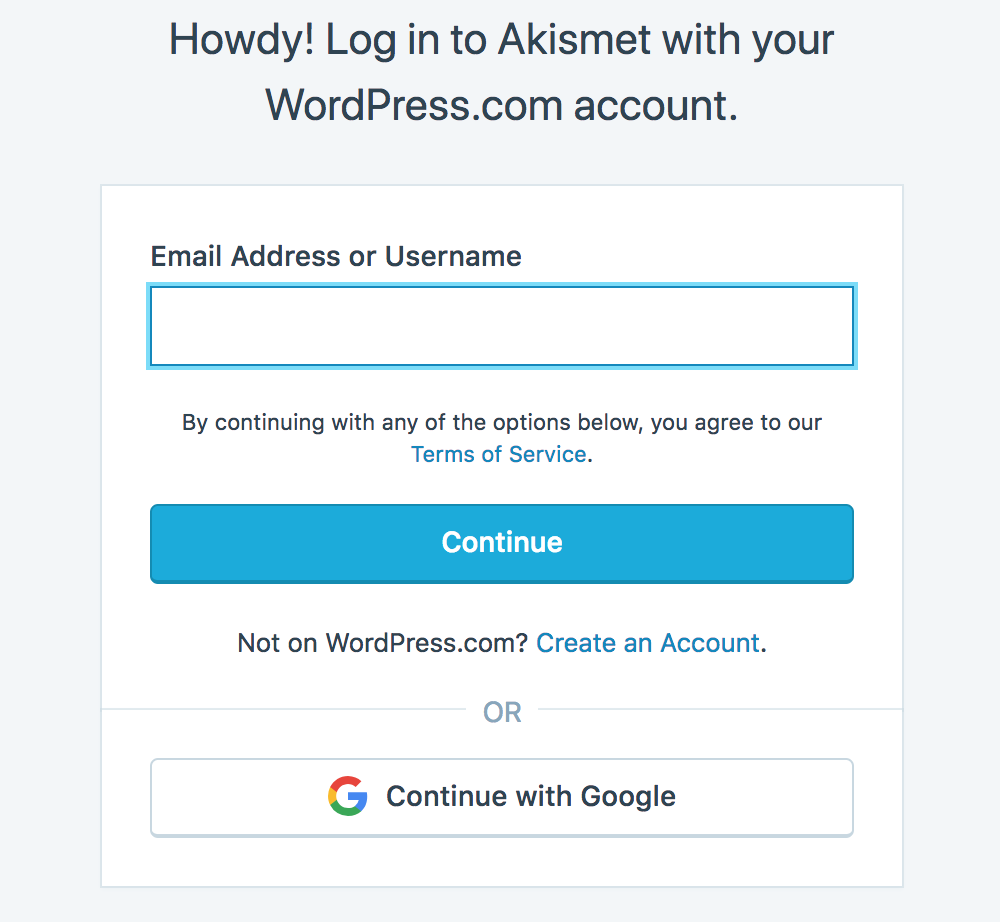
Akismet uses WordPress.com account logins to authenticate – but we are not using WordPress.com and the last thing we need is yet another account to keep track of. Fortunately, you can also authenticate with a Google account – first click on “Already have a WordPress.com account? Log in now.” link at the bottom of this page:
Ok, so that was a lie – we don’t have a wordpress.com account. But look at the next page – it gives you the option to log in with your Google account at the bottom of the page!
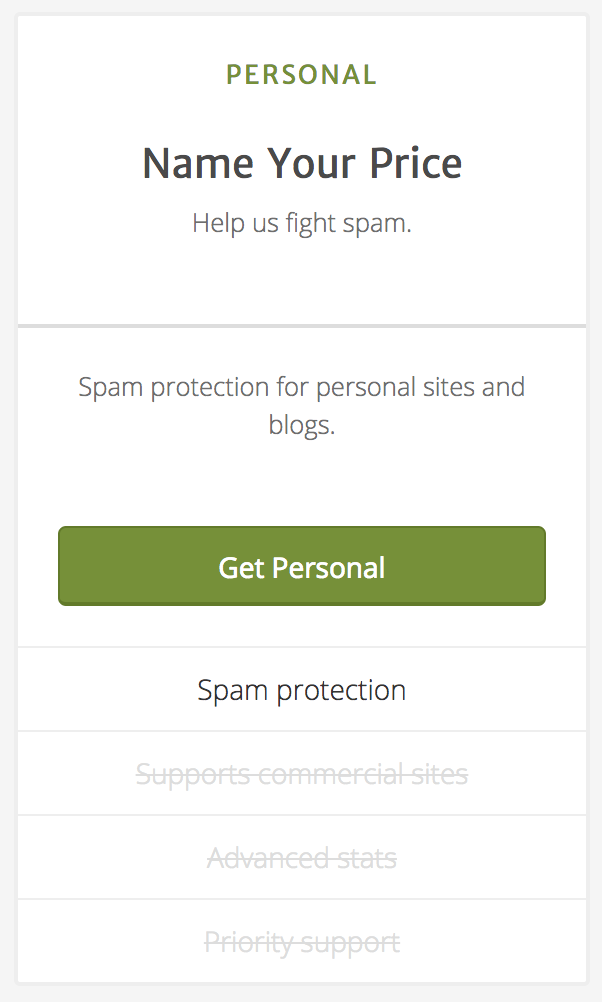
Name Your Price
Choose a pricing plan. When you get rich and famous you can get a commercial account and give Akismet big bucks for protecting you from comment spam. For now, just choose the Personal “Name Your Price” plan.
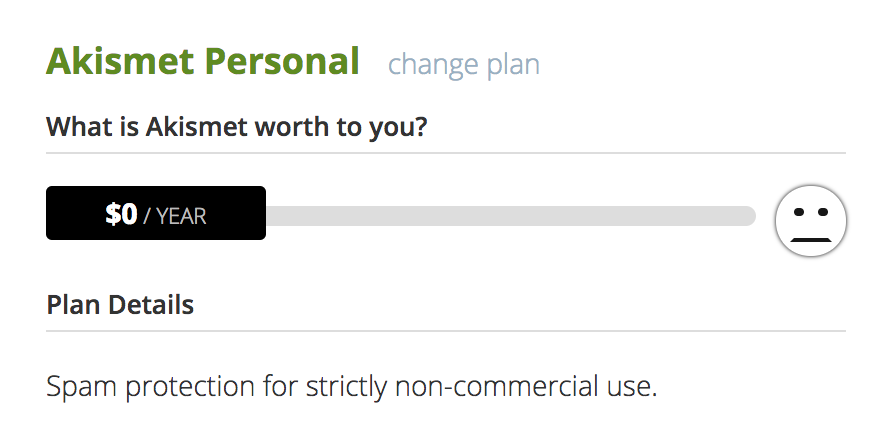
On the next page, it will allow you to name your price. Since you are a student and your blog is not a commercial business, choose $0.
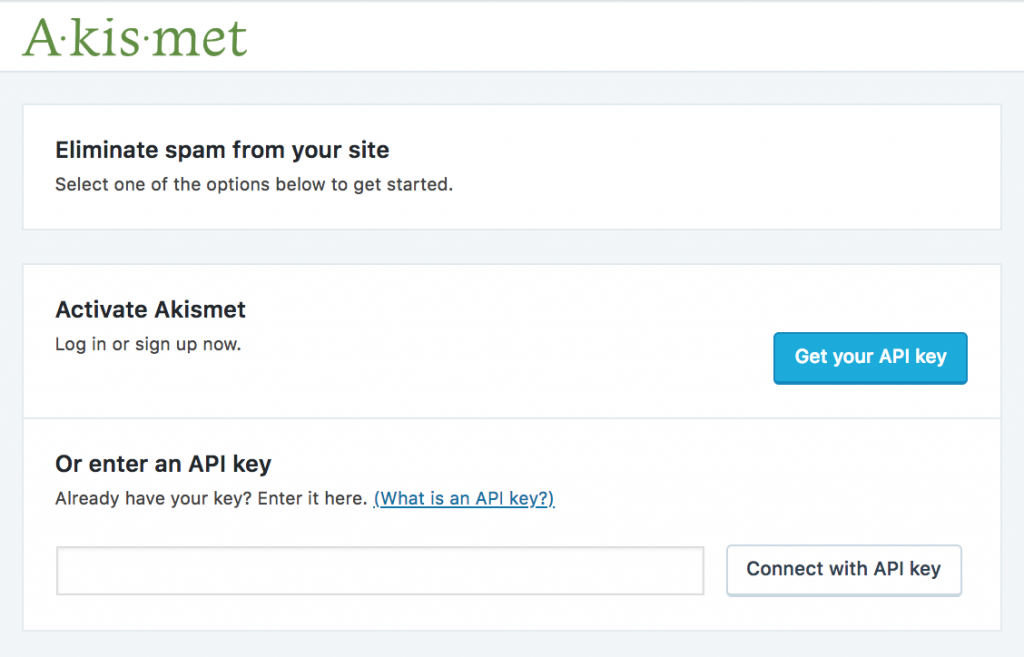
Activate Your Site and Enter Your API Key
Logged in? Good. Now you’ll be asked to “activate” your site and may need to enter your blog URL. Once you do so, you will receive your very own Akismet API key, which you can now enter in WordPress:
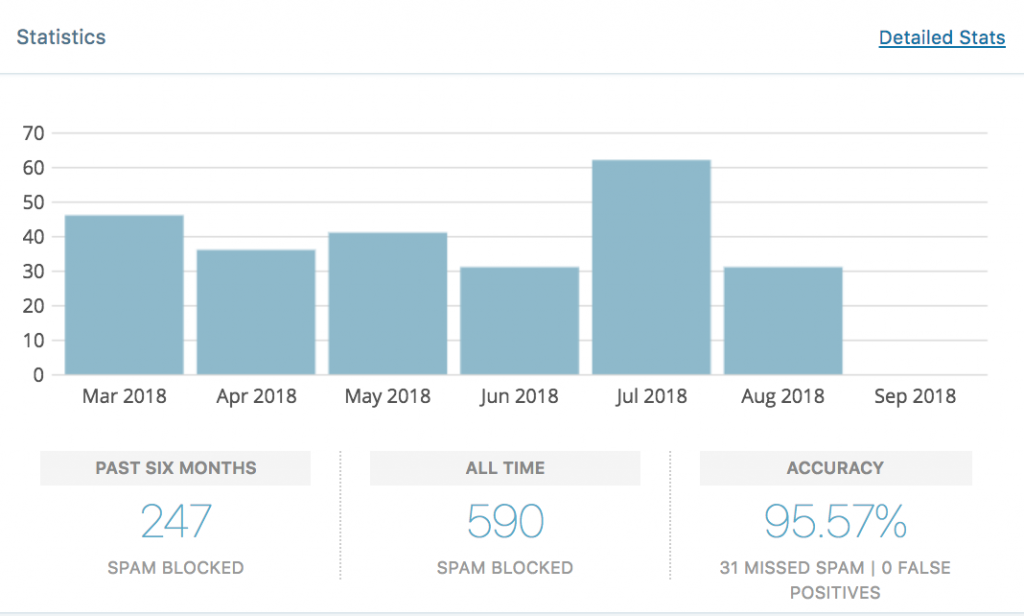
Enter your API key and click “Connect with API key”. Akismet will now be active and will start blocking spam immediately. If you’re curious, you can check in from time to time and see just how much spam Akismet is blocking.
Many #unidigadv students continue their personal branding website after our class project is complete – a few just like to have it online to refer to on their resume or portfolio site. This article will walk you through how to export your UNI WordPress website.
If you just want to save your WordPress posts and pages as work samples, you can read my post on how to simply print them from your web browser as PDF files or use a screen capture extension to take full-page screenshots of each of your posts.
If you want to transfer your entire site to a new location where you can keep it active and add more content in the future, this article will take you through the steps needed to migrate your WordPress site from the UNI server to a new location that you will control and maintain.
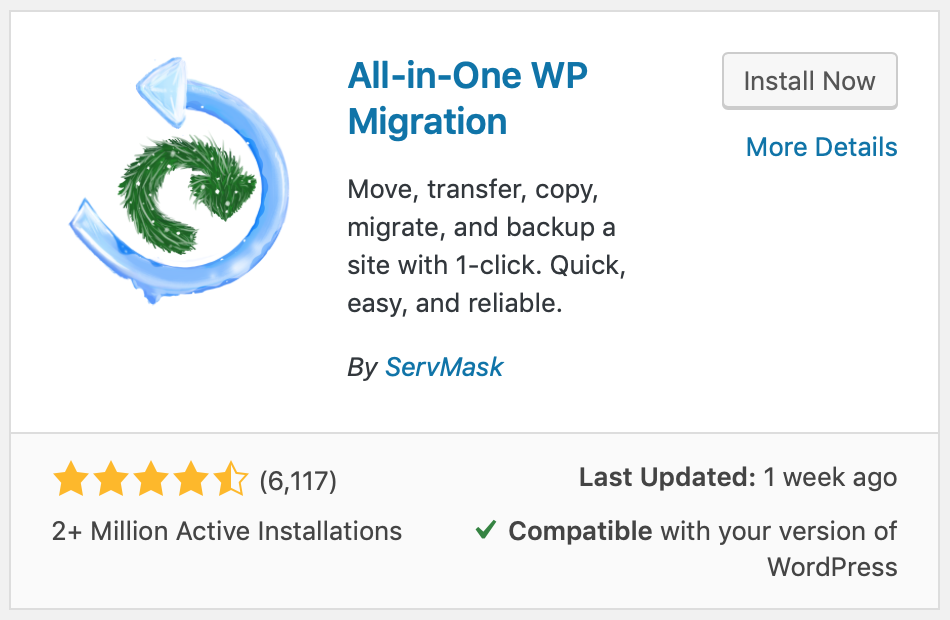
1. Install the “All-In-One WP Migration” Plugin and Export Your WordPress Site
Log in to your UNI WordPress account and mouse over the “Plugins” menu – click on the “Add New” option. Search for the All-in-One WP Migration plugin and click Install Now.
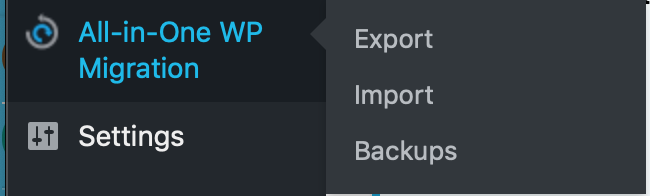
Once you have installed the plugin, click “Activate” to make it active. Then it will show up on your side nav bar.
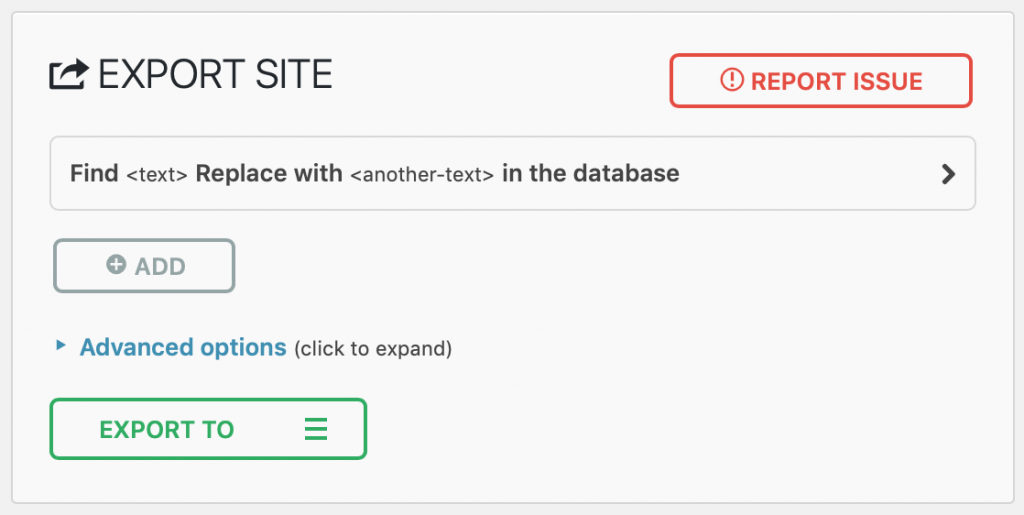
When it does, click on the “Export” option. You should see a dialog box that looks something like this:
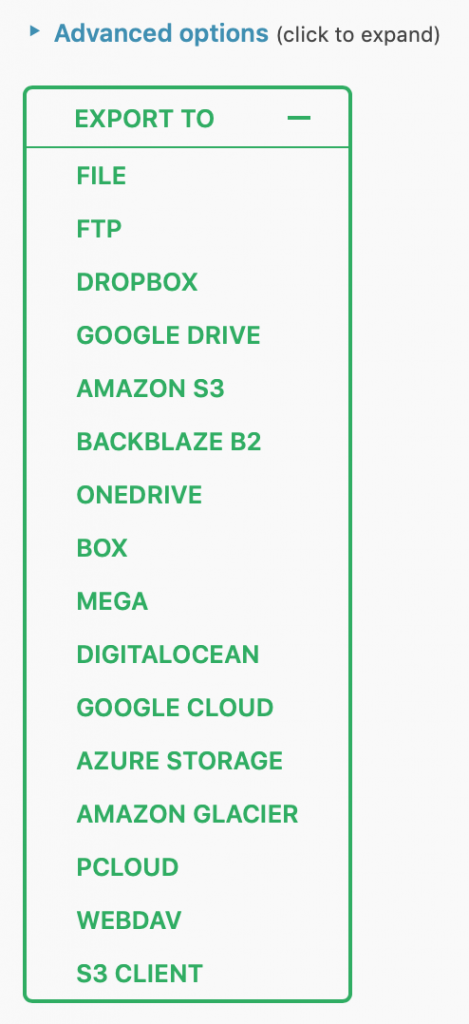
The plugin allows you to export to a variety of formats – the easiest is to export as a FILE.
Once you click on Export File, it will take a little time to compress all of your website’s assets into one downloadable file. Once it is done, you’ll be prompted to download it to your local computer.
Once downloaded, save it in a safe place until you are ready to import it into your new WordPress installation.
If you’re not ready to import it anywhere yet – you can keep this file for future use. But if you’re ready to transfer it to a new WordPress installation, go to step 2!
2. Get a Web Hosting Plan and a domain name (URL)
The next thing you need to do is to get a shared web hosting plan. Shared web hosting means you get space on a shared web server. In addition to your WordPress site, you could also host other websites for yourself (e.g. a portfolio site), your projects, or for clients.
Dreamhost offers the best shared hosting package that I’ve found. It includes no storage or bandwidth limitations, unlimited domain hosting, and one-click WordPress installations. They also include a free domain registration with an annual plan. For month-to-month billing the cost is $10.95 / month – but if you prepay for 1 or 3 years in advance, the cost comes down to $9.95 or $7.95 a month respectively.
If you Google “Dreamhost coupon” or “dreamhost discount” often you can find special deals on hosting plans that make it even more affordable.
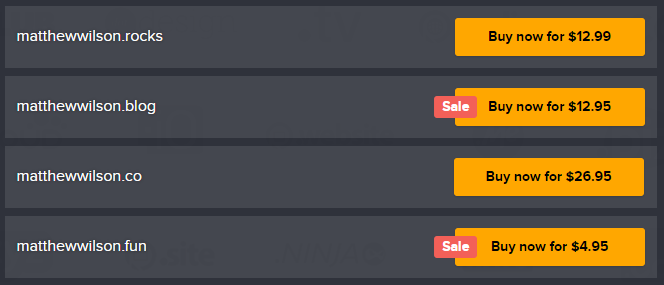
Often hosting plans will include a domain name registration. You’ll want to select a domain that is relevant to your personal brand or your name. Note that many fun Top Level Domains (TLDs) are now available besides the common .COM, .ORG, and .NET.
Once you have a hosting plan and domain in place, you’re ready to install WordPress.
3. Install WordPress
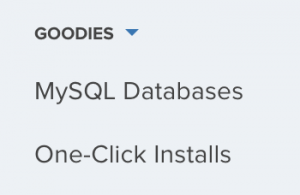
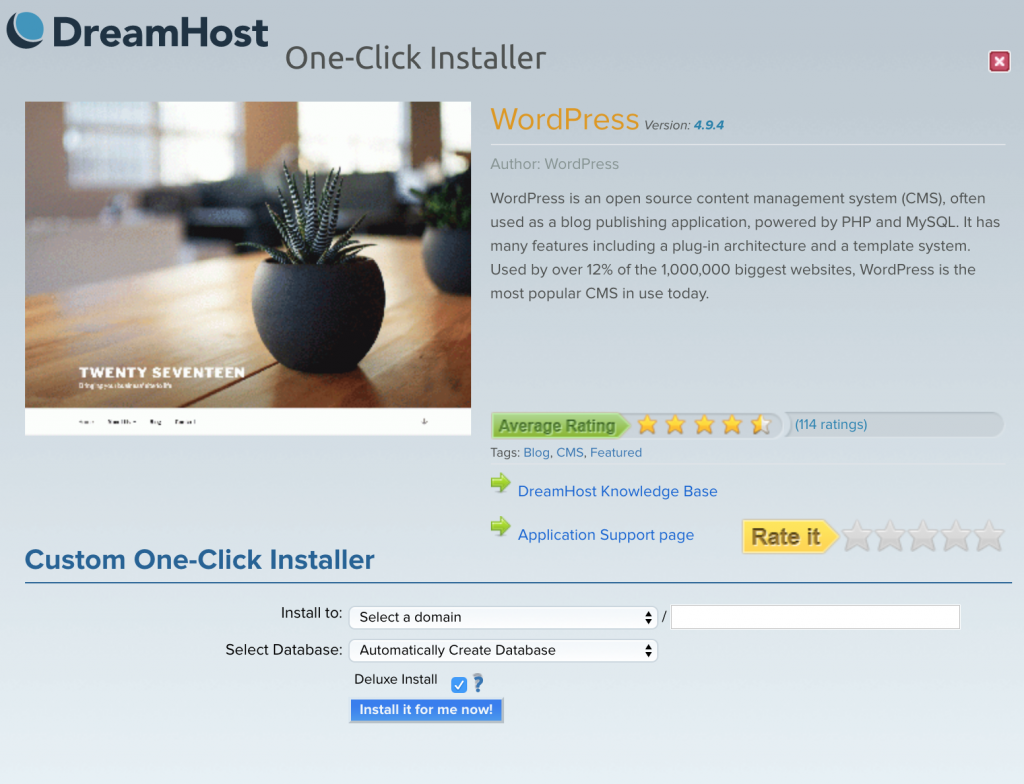
Once you are set up with your Dreamhost account and custom domain, you need to install WordPress. Fortunately, Dreamhost offers a one-click installer for WordPress in the “Goodies” section of their web hosting control panel.
You’ll just need to fill out the domain and subdirectory (if applicable) that you wish to install WordPress into and click “install it for me now”.
4. Install the “All-In-One WP Migration” plugin and Import XML file into your new WordPress installation
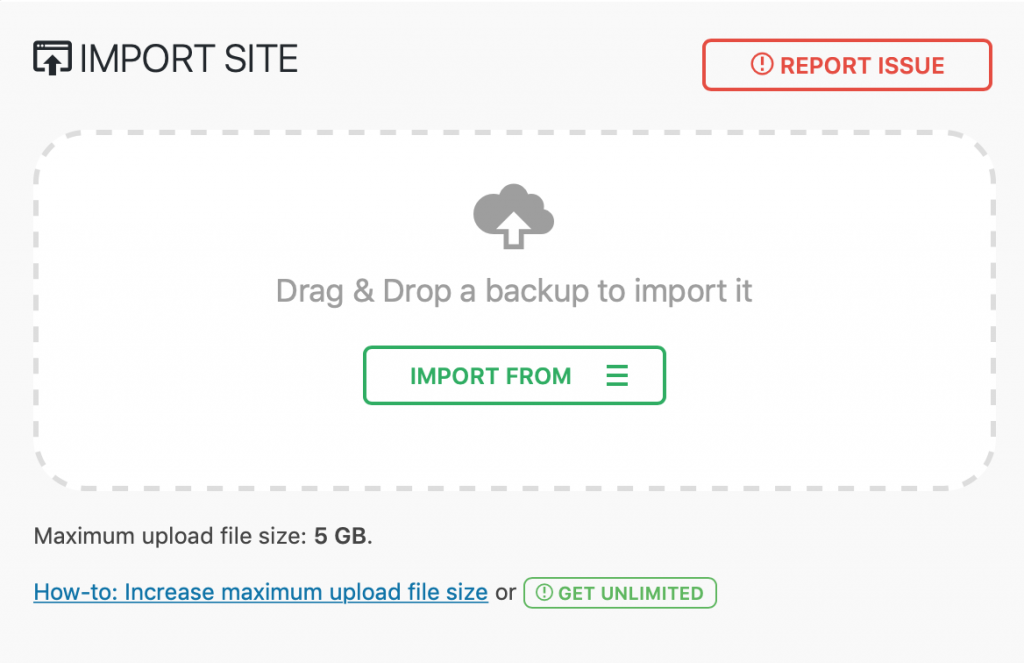
Log in to your new WordPress installation hosted on your new Dreamhost account. Download, install, and activate the All-in-one WP Migration plugin like you did in step one. Then under the menu click on the “import” option.
Click “Import From File” and navigate to the exported file you created in step one.
It may take a little time, so be patient as it imports.
5. Check your imported content
Generally, I have found that exporting and importing works pretty flawlessly as far as the content goes – but you may have to do a few things to bring your site back to its former perfection:
If you used a custom theme, you’ll need to install and apply that theme on your new WordPress installation.
If you tweaked your theme’s customization options on the old site, you may need to re-apply those changes manually to your new site.
Once you’ve double-checked that all of your content imported correctly and that your site’s theme looks correct again, you should be good to go.
6. What about your old WordPress site on the UNI server?
UNI IT will automatically remove your old site – there is no need to do anything else on the UNI server.
That’s it! You now have a new WordPress installation with all of your old content running on a shared hosting environment.
If you’re using WordPress and want to easily customize the type styles in a pre-built WordPress Theme using the many open source typefaces in Google Fonts, you’ll want to utilize the Easy Google Fonts plugin.
For example, let’s say you’ve installed the Baskerville theme but aren’t crazy about the header typeface. How do you change it?
Using a test site that I created for demonstration purposes, let’s walk through the process.
Find the Style
The first thing you need to do is identify the CSS style that controls that headline text in the HTML file code. If you “view source” on the home page of your blog and search for the words “The awesome test site” you’ll find it in the code:
You’ll notice in the code that the header text “The awesome test site” is surrounded by an H1 tag that contains an inline style assigned the class “blog-title”. To view the current settings for this style, we’ll need to find and view the CSS file for the Baskerville theme.
In the same source code, do another search for the words “.css” to see all of the associated stylesheets on this page.
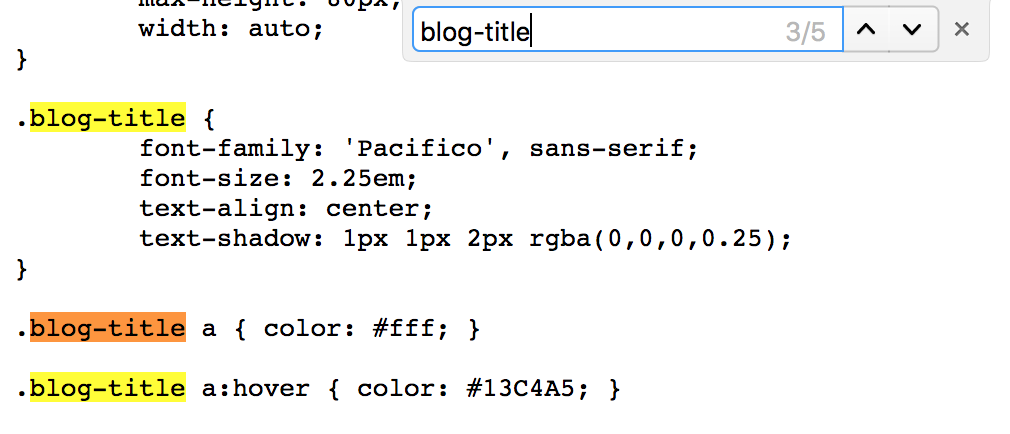
As you see, there is a stylesheet associated with the Baskerville theme embedded in the HTML code. Click on the link for that CSS code and load it up in a separate tab. Search for the style “blog-title”.
Bingo! There it is. Currently it has assigned the typeface “Pacifico” to the blog title style. Copy the style name here (“.blog-title”).
Create a Font Control
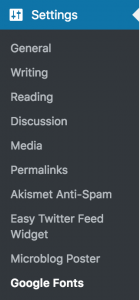
Now we’ll create a custom font control using the Google Fonts plugin that will allow us to modify this style. Back in your WordPress dashboard, navigate to the Google Fonts section under the Settings menu.
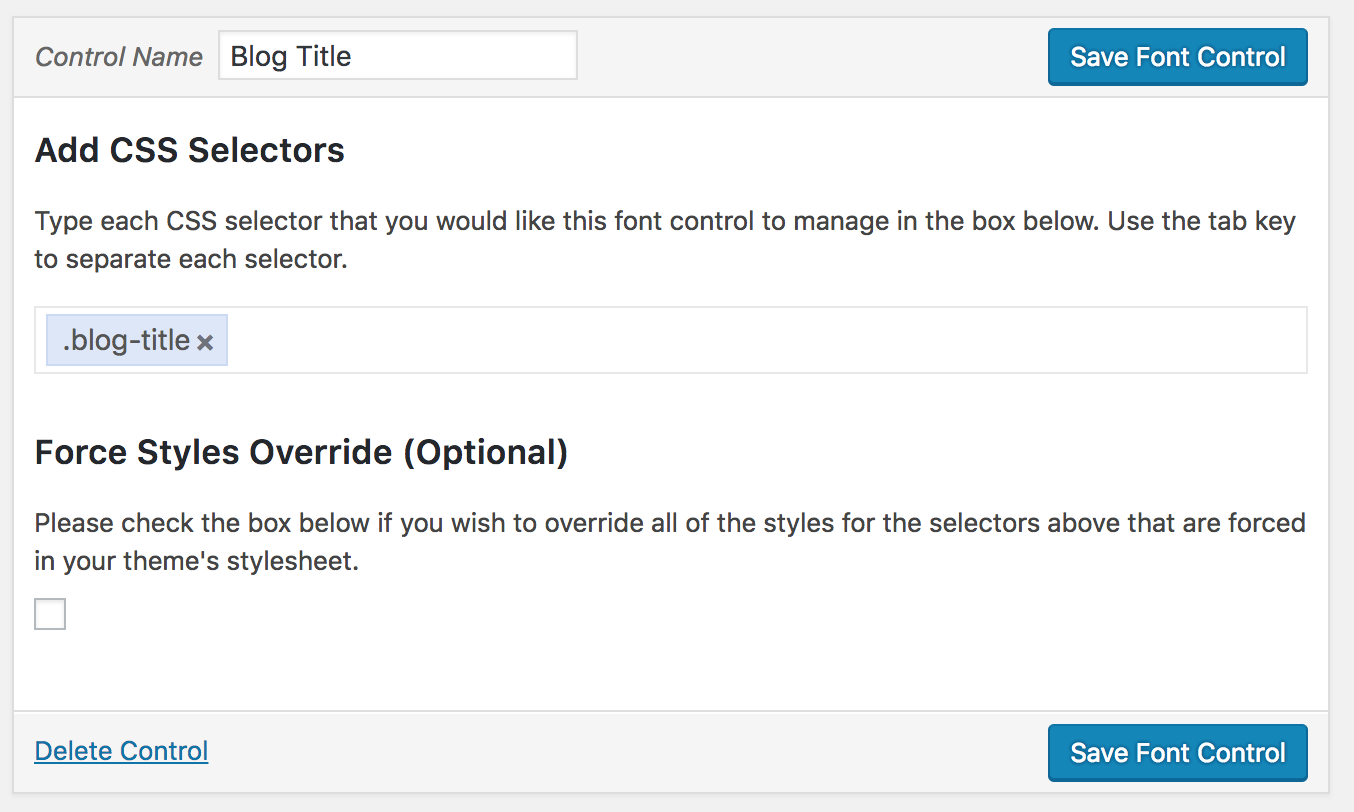
Here, you’ll want to create a new font control with the name Blog Title. In the “Add CSS Selectors” box, paste in the exact style name that you copied from the CSS file (i.e. “.blog-title”). Save this font control.
Customize Your Style!
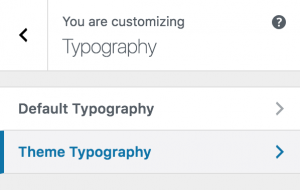
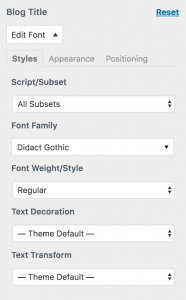
Now if you navigate to the Appearance/Customize/Typography settings, you will see a new option available.
If you click on Theme Typography you should now see the font control you just created. Click “edit font” to modify the settings for this style. All the available Google Fonts will be available in the Font Family menu. I chose a typeface called “Didact Gothic”, which is similar to the Futura typeface.
You should see your changes in real time in the preview pane on the righthand side of the screen. Once you are happy with your typeface choice, save and publish your set. Your blog will now have a custom header typeface!
Google Analytics is used by tens of millions of websites worldwide – it is a free tool to help you track and analyze the traffic on your WordPress blog or website. This post will guide you step-by-step through the process of setting up a Google Analytics account and connecting it to start tracking your WordPress blog traffic using the very awesome MonsterInsights WordPress plugin.
You’ll need to have a functioning WordPress site available at a public URL to complete these steps. Note that these instructions are for installations using WordPress.org platform – not the commercial version at WordPress.com.
Ok, so let’s do this!
1. Create a Google Analytics Account
(If you already have one, skip to step 2)
Creating a Google Analytics account is quick, easy, and free. You’ll need to navigate your browser to http://analytics.google.com/ and log in using a Google account.
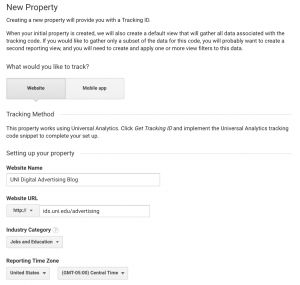
2. Create a Web Property
Once you have signed in, you’ll need five key pieces of information to create your first web property to monitor using Google Analytics:
An account name (e.g. “Matthew’s Sites”)
Your website name (e.g. “UNI Digital Advertising Blog”)
Your website URL (e.g. “digital.uni.edu/advertising”)
An industry category (Pick one that fits)
Your time zone (Central Time)
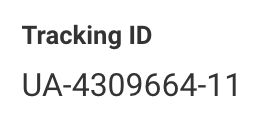
Once you have your web property created, you will be assigned a Tracking ID by Google. This Tracking ID is all you will need to connect your WordPress blog.
Write down your tracking ID and open a new tab. Navigate to your WordPress blog and sign in.
3. Configure the MonsterInsights plugin
Now we will configure the MonsterInsights plugin in WordPress (If you don’t have this plugin, you’ll need to install it into your version of WordPress).
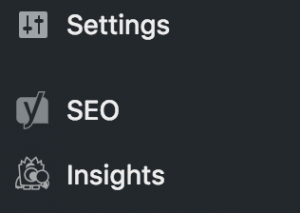
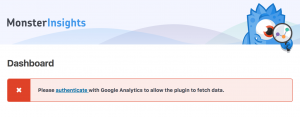
For UNI Digital Advertising students, this plugin is pre-installed for you – you can find it by clicking on “Insights” at the bottom of the left navigation menu.
You’ll have to authenticate your Google account to be able to configure Google Analytics to track your blog and to access your web property from WordPress.
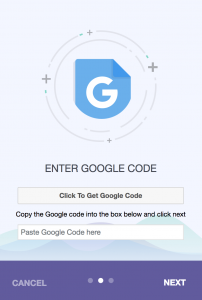
Authentication involves signing in to your Google Account and pasting the authentication code into the MonsterInsights dialog box, then clicking “next”.
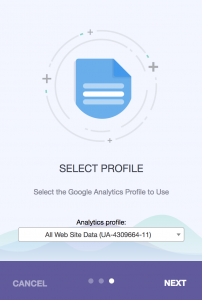
Once you have pasted the code and clicked “next”, you’ll choose the web property you want to associate with your WordPress blog. Choose the web property you just set up.
Cool – Google Analytics should be tracking your blog now!
4. Confirm that Google Analytics is Working Correctly
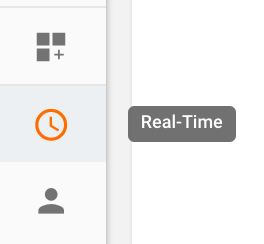
This is a fun one – kind of the equivalent of looking in the mirror to see if you’re really there. Go back to Google Analytics and select the “Real Time” clock icon on the left hand navigational menu.
Click on the Real-Time “Overview”. Now open a new browser tab and navigate to your blog url (the one you are trying to track). Once your blog’s home page loads up, go back to Google Analytics tab and look at the real time overview report. You should see this:
Nice work. You’re watching yourself read your own blog. This proves that it works and that everything is set up correctly. You’re done – go do something fun, like find animated GIFs of people clapping!
If you see 0 active users – something is not right. Go back to step three.
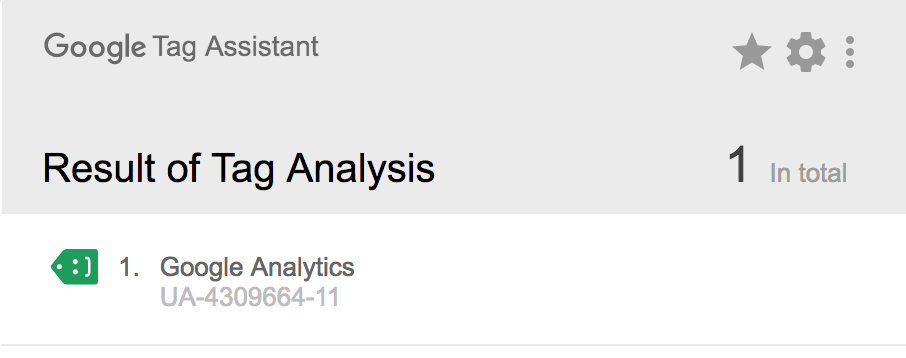
Update: You can also use the excellent Google Tag Assistant Chrome plugin or the Ghostery browser extension to check to ensure that the Google Analytics code is properly working.
Ever notice that some websites have neat little custom icons next to them in your browser tabs when you load them up?
These icons add an element of unique branding to websites, giving them a professional appearance.
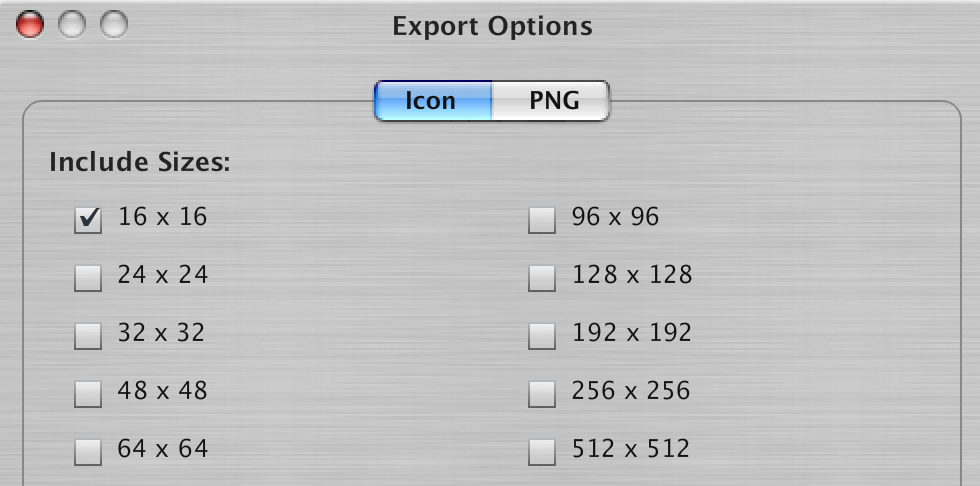
They’re known as branded favicons. Favicons are literally “favorite icons” – short for when bookmarks for websites were called “favorites”. They are very small (usually 16 x 16 pixels). In addition to appearing in the address bar, favicons also appear in browser tabs, bookmarks, and the links bar.
How do you Create a Branded Favicon?
Traditional favicons are saved in the ICO graphic file format (used for old school Windows icons). Photoshop used to be able to save to this format, but no longer does. Not to worry – just create a 16×16 pixel GIF or PNG and use the icon utility ConvertIcon.
A newer type of icon is the Site Icon, used by WordPress. The Site Icon can be a PNG or GIF up to 512 x 512 pixels. Once uploaded, WordPress automatically creates a favicon, along with many other icon sizes in between for various mobile devices.
Adding a Favicon to your Websites
Once you have your custom 16×16 favicon in the ICO format (or 512×512 Site Icon), here are some instructions on how to get them working on your site or blog:
Favicons on websites
Favicons can be hand coded into any HTML file with a single line of code in the HEAD section:
However, doing this for every page in a site is tedious and prone to inevitable error. An easy workaround is that most browsers will automatically look for a file called favicon.ico at the root level of your site. If you simply copy your favicon file to your root level, you should be good to go.
Favicons on Blogger blogs
Easy. Go to the Blogger admin page and click on Layout. You’ll see on the top left of your layout an area called Favicon where you can upload your ICO file by clicking on “Edit”.
Favicons on WordPress sites
WordPress users have it a little easier – they can use PNG or GIF files that are 512 x 512 pixels. WordPress will resize as needed. Just go into Appearance / Customize in your WordPress admin page. Most themes will allow you to customize your “Site Identity” which includes a custom site icon. Just click on “Select Image” and upload your 512 x 512 PNG or GIF image. WordPress takes care of the rest.
Now that you know what favicons are and how to create them – why don’t you make one for your blog?
One of the powerful aspects of social content is that it is portable – that is, it can be easily shared and republished in a variety of ways. Whether it is an Instagram photo or a Tweet, this content is designed to be shared as a social object. This post will take a look at Tweets and how you can embed tweets in WordPress blogs or websites in their native format. Embed Tweets on Your WordPress Blog
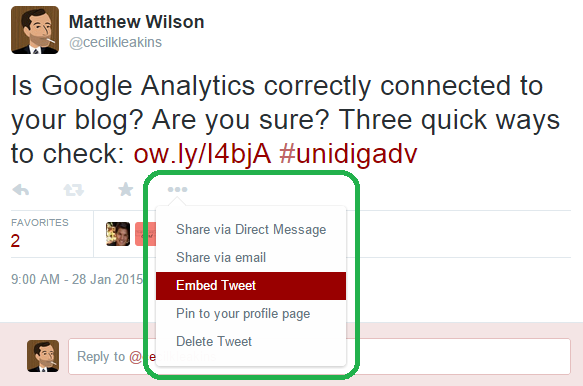
Twitter content is perfect for sharing. Tweets are usually concise thoughts that are short and to the point. They can quickly summarize a person’s point of view, opinion, or outlook without getting too detailed. You can easily screen-capture a tweet and include it in your blog as an image, but if you want to give readers an easy way to favorite, retweet, or reply to the tweet right from your blog page, you’ll want to embed it. Every tweet has a “More” menu accessible by clicking on the button with the three dots that appears at the end of the tweet. Go to this menu and select “Embed Tweet”.
This will give you a snippet of custom code that can be added to a website or blog. To get this code, simply copy it from the “Embed this Tweet” dialog box and close it.
To embed this tweet in a WordPress post, simply create a new post (or edit one you’ve already started), select “text” editing mode, and paste the code from Twitter. Save the post and preview or publish it. Here’s an embedded tweet to show you how this content appears in a WordPress post:
Notice how you can reply, favorite, or retweet the content right from this page? Any links or hashtags are also clickable. MUCH more functional than a screenshot.
You can similarly embed a tweet in another content publishing tool or website by pasting this embed code snippet directly into your HTML code.
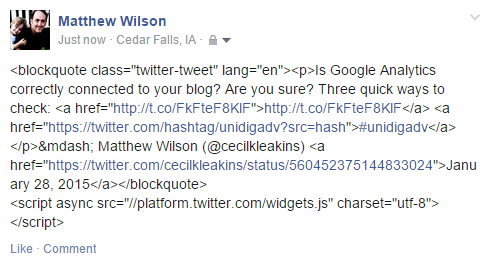
Can I Embed Tweets in Facebook Posts? No. This method will NOT work as a way to embed tweets in other social media content. Here is what happened when I tried to use this embed code in a Facebook post:
Facebook does not allow HTML markup tags within status updates, so the code appeared exactly as it is.
For more info on embedding Tweets, see this Twitter Help Center article.
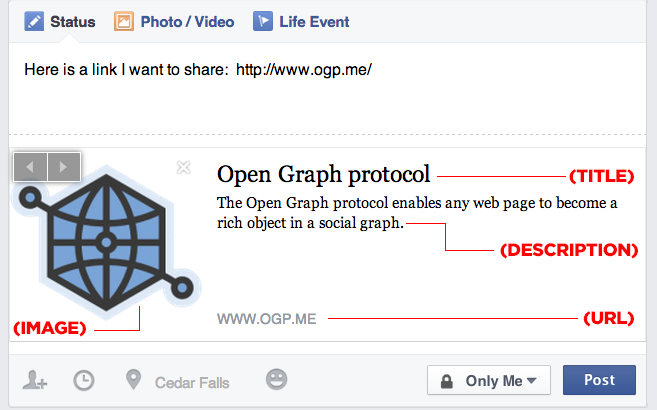
The Open Graph Protocol is a relatively new way to turn any web page into a sharable social object by adding tags to identify key attributes for that page when shared on a social network like Facebook. Before we look at these OGP tags and how to integrate them into your Blogger blog, let’s take a look at how website links are shared on social networks. Sharing Links on Facebook When you share a URL while creating a Facebook status update, Facebook scans that webpage and automatically generates a preview of that content which includes some useful information in addition to the URL you typed:
A TITLE for the web page you are sharing
A brief DESCRIPTION of the content on that page
An IMAGE from the page
Once you publish your status, these extra bits of information become very important, as they will likely influence whether one of your friends will click on the link. If the image looks intriguing, or if the copy seems interesting, your shared URL will likely be clicked on. However, sometimes when you share a link, Facebook’s automatically generated image, title, and description are either missing entirely or not very compelling. In the post below, notice that there is no associated image or description – just a title and url.
As digital content publishers who want to make our content as sharable and clickable as possible, this can be a real issue. Fortunately, Facebook provides a number of sharing best practices that can help. First Step: Learn about the Open Graph Protocol Facebook describes several open graph tags that it recommends integrating into your site to help Facebook generate previews. The main tags which Facebook uses when generating previews are:
og:title – the title of the page you are sharing
og:description – a detailed description of the content on the page
og:url – the URL of the web page
og:image – the URL of the image you want shown
og:site_name – the name of the website you are sharing
og:type – the type of content you are sharing (blog, website, article, etc)
The syntax for an open graph tag is similar to other meta tags used in HTML. For example, the og:title tag can be written as: <meta property=”og:title” content=”Title of your Page”> Open graph tags are placed in the <head> section of your HTML file. For a complete description of each tag, visit the Open Graph Protocol website. How Facebook “Sees” your Page To understand how Facebook ingests a webpage to generate a preview, use Facebook’s Open Graph Debugger. This helpful tool will allow you to enter any URL and get a “scrape” of what Facebook finds when it scans the page. It will alert you when there are issues that need to be addressed.
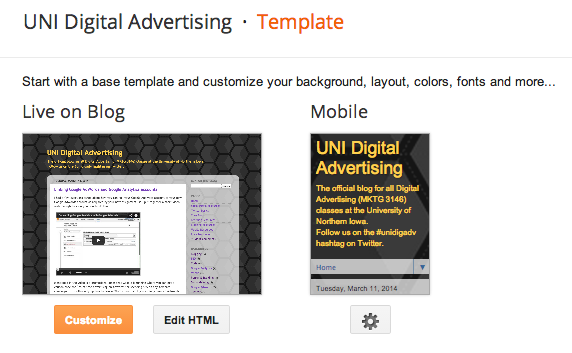
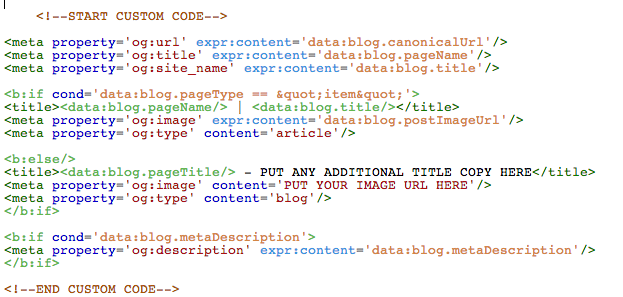
It will also generate a preview to show you how your page will appear if a Facebook user shares it on their timeline. Time to Fix your Blogger Blog, OG style In a previous post, I discussed the use of Title and Meta Description tags, which are very important for your blog’s SEO. I also described a method of optimizing how Blogger generates title tags to improve your blog’s SEO. Read these posts before you go any further! Because Blogger dynamically generates the pages in our blog based on templates, we thankfully do not need to manually add OG tags to every blog page/post. That would be a major headache! Fortunately for us, we can update a few lines of HTML code in our blog’s template that will automatically update all our pages and posts – including any new pages and posts we create in the future. What we’ll be doing is telling Blogger exactly how to handle the TITLE, META DESCRIPTION, and OG tags on 1. your blog’s home page and 2. your blog’s various posts and pages. We will do this by using IF statements. Here is the code you will insert into the <HEAD> section of your Blogger template: <!–START CUSTOM CODE–> <meta property=’og:url‘ expr:content=’data:blog.canonicalUrl’/> <meta property=’og:title‘ expr:content=’data:blog.pageTitle’/> <meta property=’og:site_name‘ expr:content=’data:blog.title’/> <b:if cond=’data:blog.pageType == "item"’> <title><data:blog.pageName/> | <data:blog.title/></title> <meta property=’og:image‘ expr:content=’data:blog.postImageUrl’/> <meta property=’og:type‘ content=’article’/> <b:else/> <title><data:blog.pageTitle/> – PUT ANY ADDITIONAL TITLE COPY HERE</title> <meta property=’og:image‘ content=’PUT YOUR IMAGE URL HERE‘/> <meta property=’og:type‘ content=’blog’/> </b:if> <b:if cond=’data:blog.metaDescription’> <meta property=’og:description‘ expr:content=’data:blog.metaDescription’/> </b:if>
<!–END CUSTOM CODE–> Select this code and COPY it. Then read on. Important note: before you start editing your blog’s HTML code, you’ll want to make sure that you are happy with the template you are using. Because we’re going to customize the code associated with a specific instance of a template, it is important to realize that if you ever change your template for any reason, you will lose the work you’re about to do! Time to Get Geeky: Come Edit Your Template’s HTML with Me Ready? Let’s do this. Go to Blogger and click on your blog. Click on the “Template” button on the left hand menu.
Click on the “Edit HTML” button and be prepared to feel a surge of geeky neuronic energy course throughout the synapses of your brain.
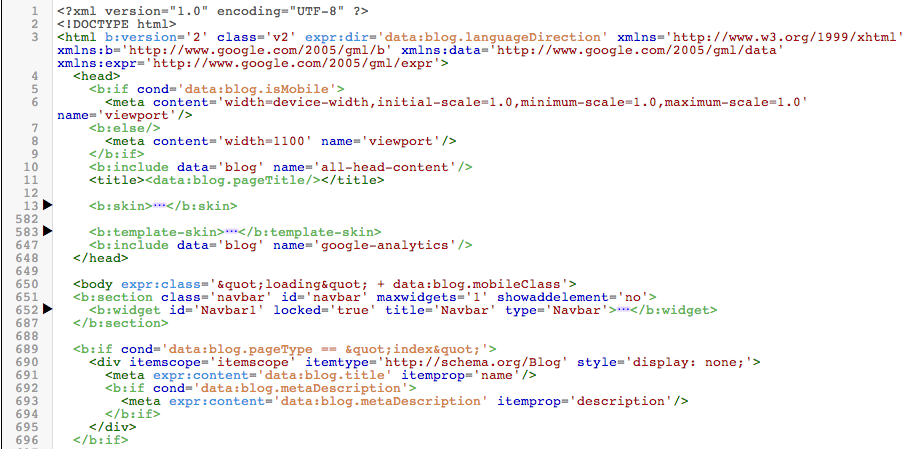
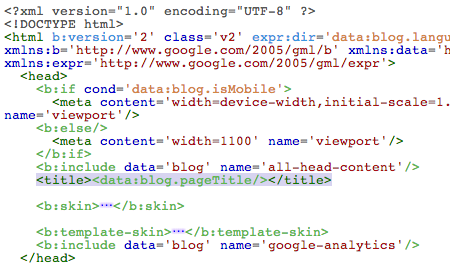
Take a deep breath. Repeat to yourself: “It’s just a text file. It’s just a text file. I can handle this!” Now very carefully find the <title> tag that exists in the code. Select the title tag code and everything inside it.
Delete it. Then replace it with the code I gave you earlier in this post.
Be sure to carefully EDIT the parts of the code marked “PUT ANY ADDITIONAL TITLE COPY HERE” and “PUT YOUR IMAGE URL HERE”. This code creates og:url, og:title, and og:site_name tags that are dynamically generated from Blogger’s page url, Blogger’s page title, and your blog’s title. It then creates og:image and og:type tags (IF the page is a normal post or page). Otherwise, it creates og:image and og:type tags for your home page which are different. Finally, it creates an og:description tag that is populated from the meta descriptions that you create for your pages. Once you are done, click “Preview template”. If you have made any errors or broken any of the code – it should give you an error message and tell you what the issue is. If your preview looks good, then click “Save Template”. You’re Not Done Until You Test Your Pages! To test your pages, go back to Facebook’s Open Graph Debugger and try your pages out. It will give you a preview of how each page will look when shared.
Yeah! That’s what I’m talkin’ about! Acknowledgements I’d like to acknowledge the help of the following two blog posts which helped me greatly in patching together the above code that both improves SEO and adds OG tags to Blogger posts and pages: Adjust Blogger Title Tags to Improve SEO by Muhammad Faisal and How to Add Open Graph Protocol in Blogger Blogs by Muntasir Minhaz Thanks guys!