
Install Google Analytics 4 on your WordPress site

Google Analytics is one of the most widely-used web analytics platforms in the world – used by 56.8% of all websites globally as of today. In 2019, Google came out with a new updated version referred to as Google Analytics 4 (GA4). This post will walk you through how to install Google Analytics 4 on your WordPress site.

Before you begin

If you are signed in to multiple Google accounts (A UNI account, your personal account, etc) this can cause issues when you are creating these accounts. To avoid problems, open an Incognito window in Google Chrome. Using this window, you’ll be signed out of all accounts and can proceed intentionally, only signing into the one Google Account you wish to use.

1. Create a Google Analytics Account

(If you already have one, skip to step 2)

Creating a Google Analytics account is quick, easy, and free. You’ll need to navigate your browser to the Google Analytics website and log in using your Google account.

You’ll have to enter a name for your account (like… “Matthew’s Personal Account” or “My Digital Advertising Account”). It will then ask for permission to share data – only sharing with “Google products and services” is necessary – the other options are up to you.

2. Create a Property to Manage

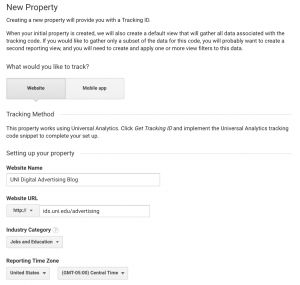
Once your account is set up, Google will ask you to set up your first property.

You’ll need to give your property a name – I’d use the name of your website. Then set the time zone and currency.

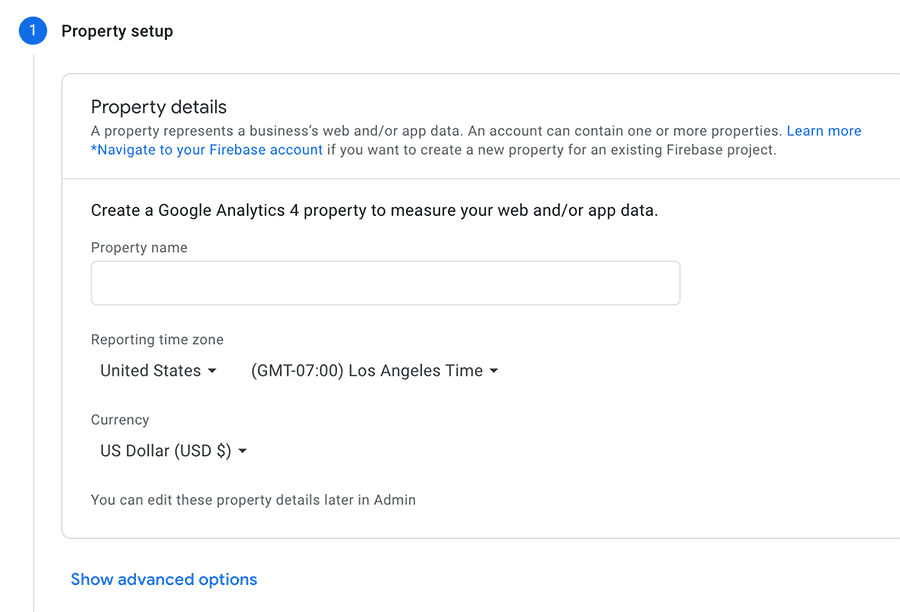
Google will then ask some general questions about your “business” – don’t be alarmed – just select a category that describes your website, put that you have one employee, and check any boxes that sound like they’d be useful.

Next, you’ll want Google to know the type of property you want to manage.

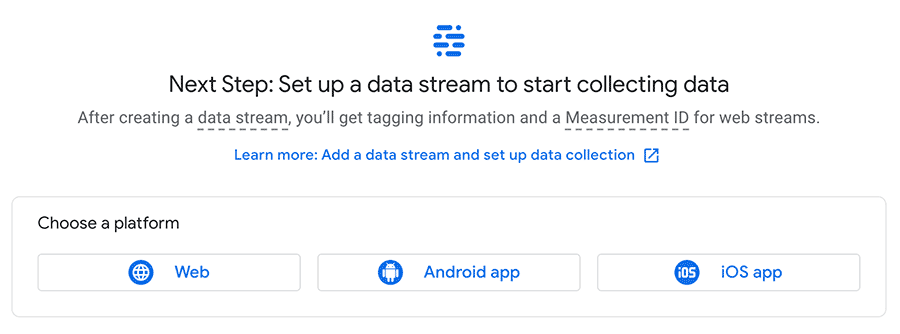
Since we want to use Google Analytics 4 on your WordPress site, select “Web”.

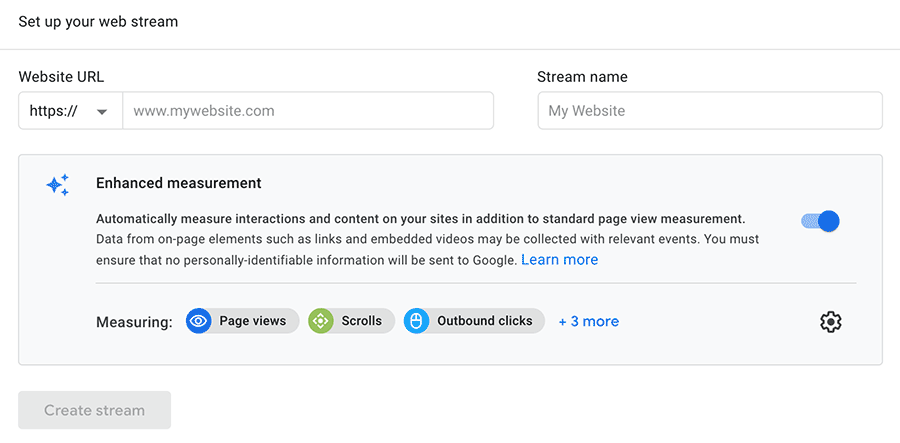
Type in your Website URL and give your stream a name (“My Website Stream” is fine). Be sure “Enhanced Measurement” is enabled. Then click “Create stream”.

Great! You’ve created a Google Analytics account and a web property for your website! Now – keep this window open and open a new tab in your browser to complete the next step.

3. Create a Google Tag Manager Account

Now that you have a GA4 account and web property, we need to get you set up on Google Tag Manager so you can connect your GA4 web property to your WordPress website.

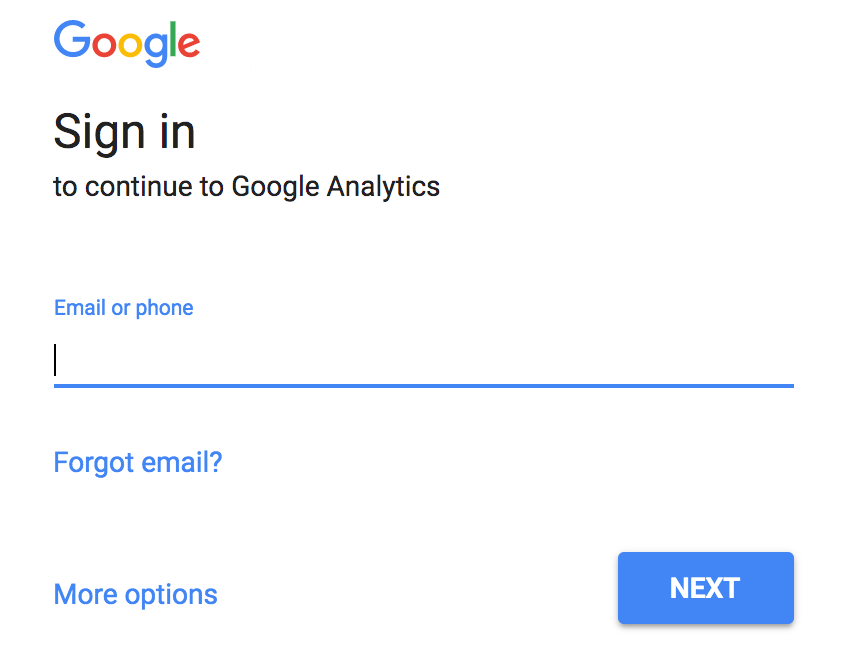
Let’s head over to tagmanager.google.com to create our GTM Account. Log in with the same Google Account you used to create your Google Analytics account. Click “Create Account” to get started:

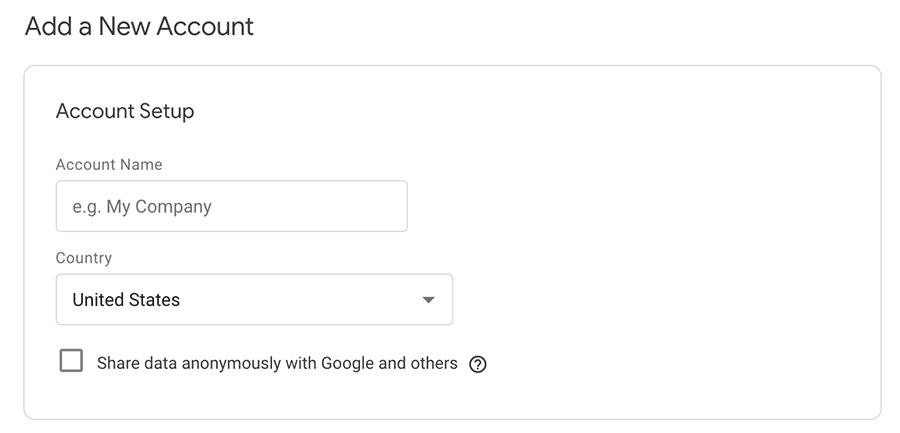
Once you’ve given your account a name and country, you can set up your first container:

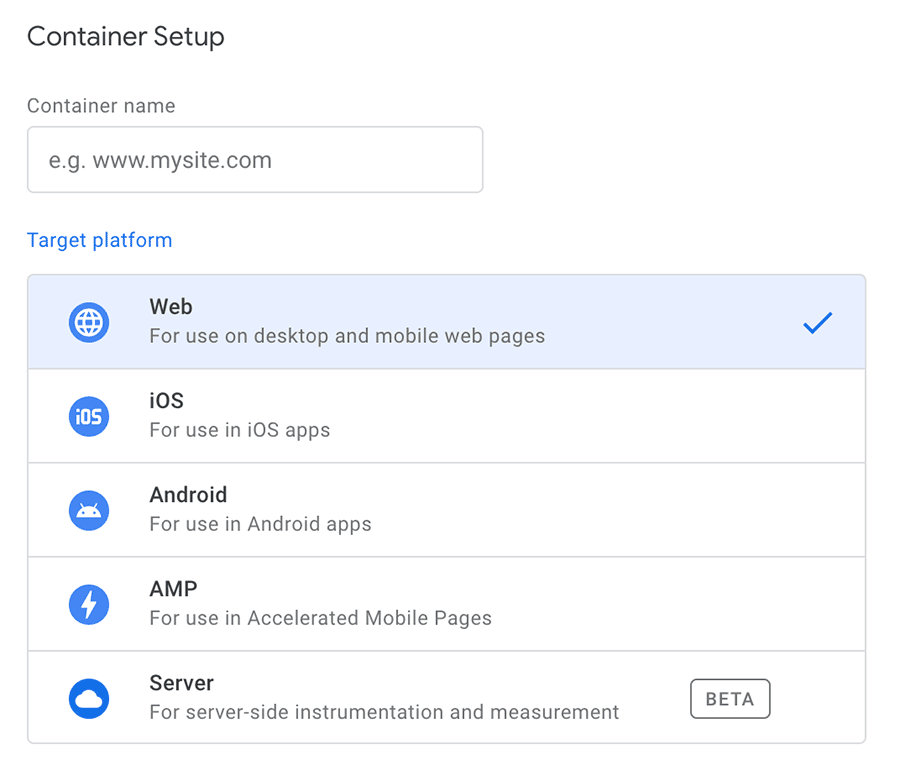
Be sure to check that your Target Platform is “Web” – since your WordPress site is a website, not a mobile app.

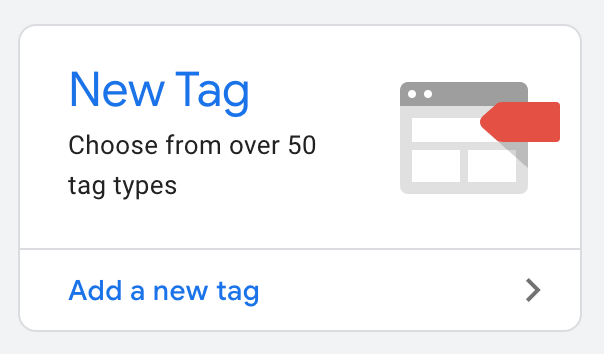
4. Add a Google Analytics 4 Tag to your Container

Now that you have created your container, you’ll want to add a GA4 tag to your container and set it to fire every time a page on your website is loaded.

We’ll want to give our tag an identifiable name (like “GA4 Tag”) and select a tag type. Choose the tag type: “Google Analytics: GA4 Configuration“.

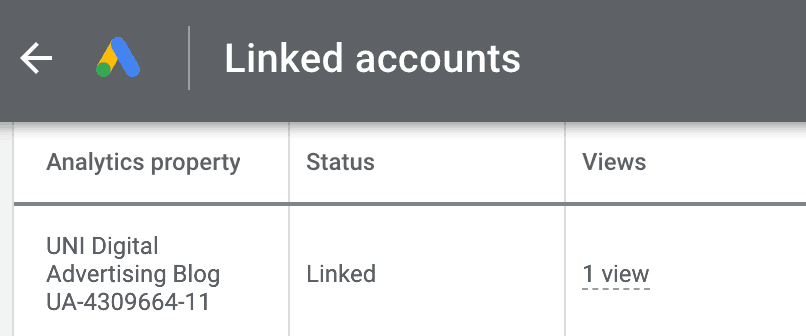
Next, you’ll need to add your GA4 property’s Measurement ID so that Google knows which Analytics property to use. You can find your Measurement ID in your Google Analytics web stream details.

Now we’ll select a firing trigger that will determine when to run our code. In our case, we’ll want it to run on All Pages.

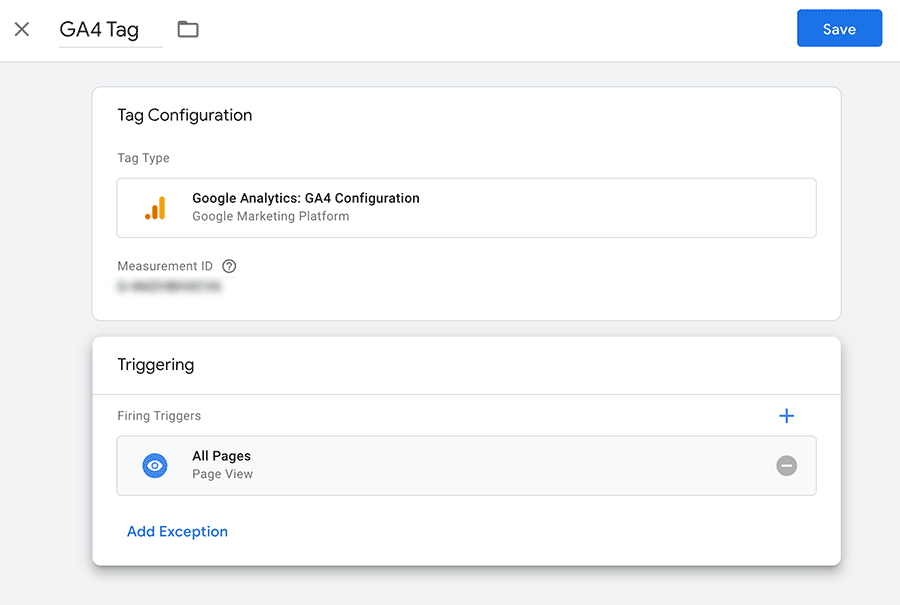
When finished, your tag should look something like this. Save this tag configuration and click “Submit” to publish your tag.

5. Last Step: Configure the Google Site Kit WordPress Plugin

Ok, you’re nearly there! One last thing to do: Log in to your WordPress Dashboard and click on Plugins. If you don’t yet have the Google Site Kit plugin downloaded and installed, you’ll want to quickly do that.

The Site Kit by Google WordPress Plugin

Go to Site Kit’s Dashboard to set it up – first you will need to authenticate with your Google account by clicking on the “Sign in with Google” button:

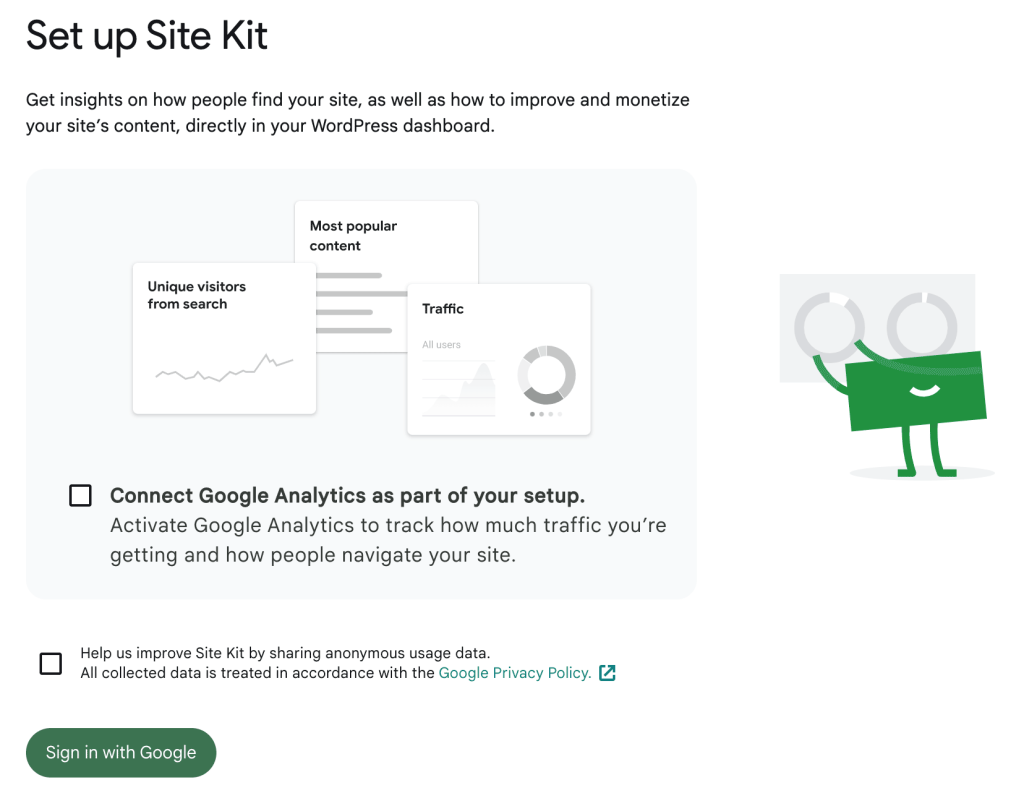
You will need to give Google Site Kit access to data from your GTM, GA, and GSC accounts.

Give Google Site Kit Access to the data it needs.

Once you have given access to Site Kit, you should see Tag Manager appear with a green check mark in “Connected Services” in your Site Kit Settings.

This should be all you need to get started – however, if you’d like to view your Google Analytics data in WordPress itself (without having to log into Google Analytics) – you’ll also need to connect your GA4 account.

Site Kit with all services correctly connected.

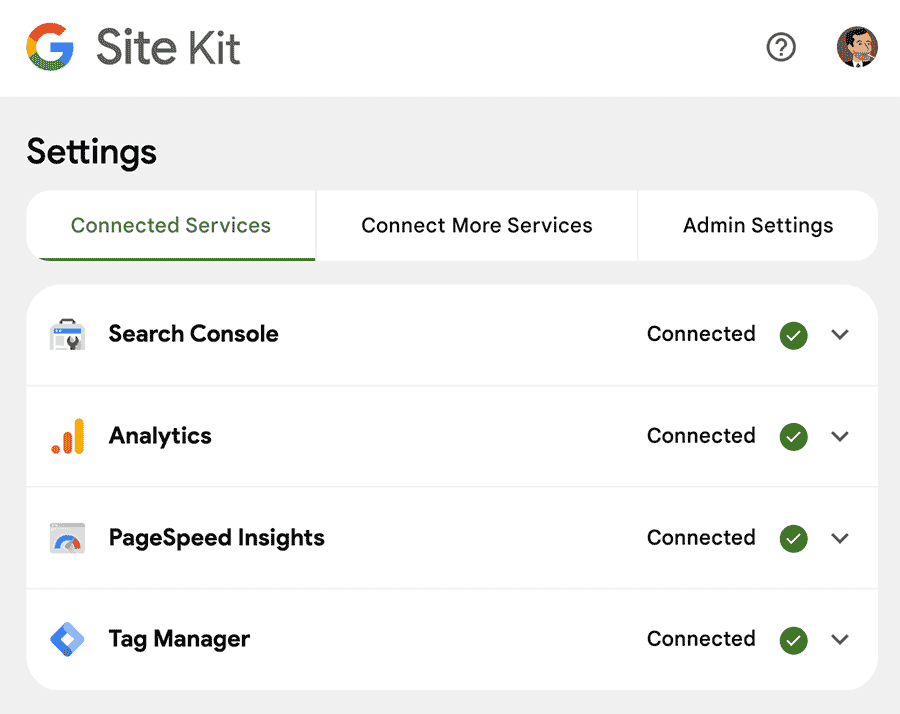
Once you have Tag Manager, Search Console, and Google Analytics connected, you should be all good!

I Lied – There is One More Step!

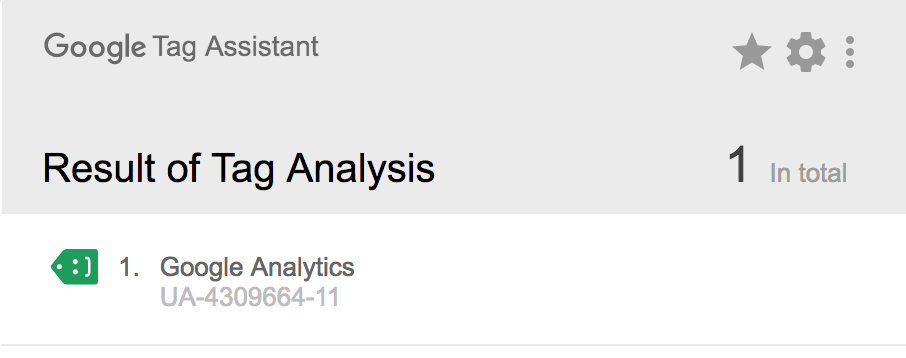
We need to confirm that everything is working properly!

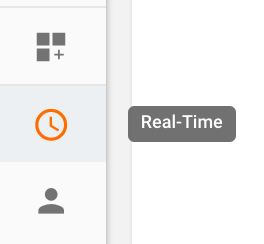
The easiest way to do this is to load your website in a Google Chrome Incognito window and while leaving that open, check your Google Analytics Realtime Report to see if you show up.

Hey look – there I am!

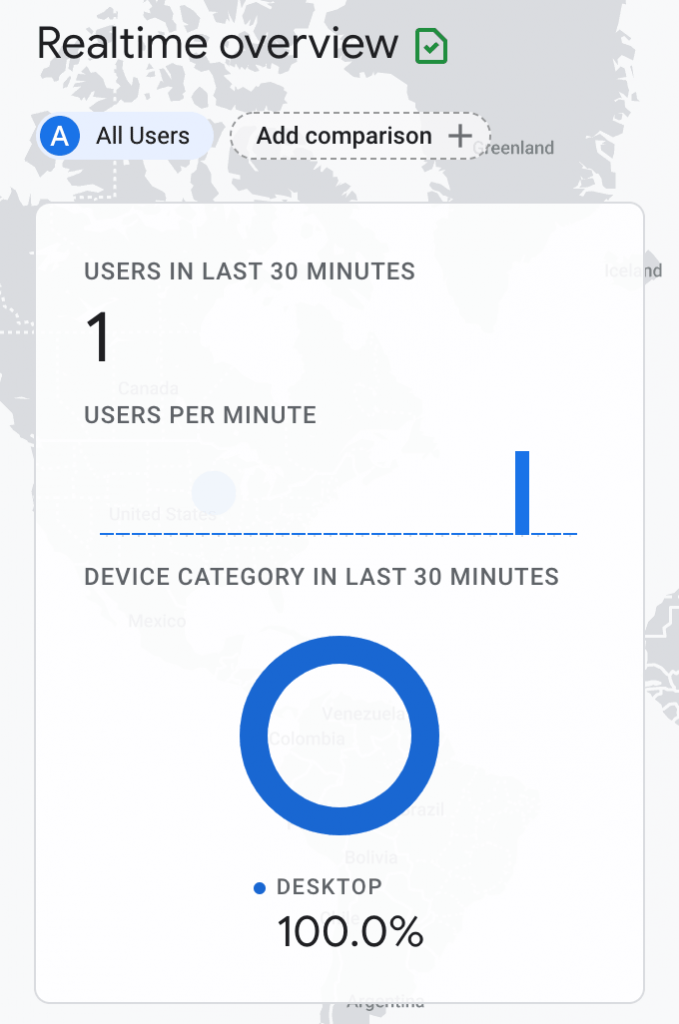
Once you have confirmed that Google Tag Manager has fired your GA4 tag from WordPress – you truly are done and should remind yourself how awesome you are!

You Have Now Installed Google Analytics 4 and Google Tag Manager on your WordPress site!

Link Your Google Ads and Google Analytics Accounts

If you are running campaigns using Google Ads, you’ll want to link your Google Ads acccount with your Google Analytics account to get full analytics on the activity of the clicks you pay for coming from your Google Ads campaigns.   

To do this, follow the instructions on this Google Analytics support page.

Or watch this short video:

Important Settings

When you link your Google Ads account to your Google Analytics account, there are a couple of important settings to make sure you get right.

Import Site Metrics

When you link your Google Analytics account, you’ll want to make sure that you have the option to “Import site metrics” turned on. If you’re not sure if this is turned on or not, go to Linked Accounts and find your linked Analytics web property – click on your “view”.

You should now be able to see if “Import site metrics” is turned on.

Enable Auto-Tagging

Auto-Tagging is an essential feature that allows Google Analytics to import important Google Ads data such as conversion, cost, and campaign data into Analytics reports.

Unfortunately, auto-tagging is turned off by default! You’ll need to enable it to turn it on. You can do this in Google Ads left hand navigational menu under Settings/Account Settings

Make sure both accounts share a common Google account. If your Analytics account was created with one Google account and your Ads account was created with a different one, you will not be able to link your accounts.

To fix this, simply add your second Google account as an additional user to your Google Analytics account and try linking accounts again.

Use Google Analytics with your WordPress Blog with the MonsterInsights plugin

Google Analytics is used by tens of millions of websites worldwide – it is a free tool to help you track and analyze the traffic on your WordPress blog or website. This post will guide you step-by-step through the process of setting up a Google Analytics account and connecting it to start tracking your WordPress blog traffic using the very awesome MonsterInsights WordPress plugin.

You’ll need to have a functioning WordPress site available at a public URL to complete these steps. Note that these instructions are for installations using WordPress.org platform – not the commercial version at WordPress.com.

Ok, so let’s do this!

1. Create a Google Analytics Account

(If you already have one, skip to step 2)

Creating a Google Analytics account is quick, easy, and free. You’ll need to navigate your browser to http://analytics.google.com/ and log in using a Google account.

2. Create a Web Property

Once you have signed in, you’ll need five key pieces of information to create your first web property to monitor using Google Analytics:

  • An account name (e.g. “Matthew’s Sites”)
  • Your website name (e.g. “UNI Digital Advertising Blog”)
  • Your website URL (e.g. “digital.uni.edu/advertising”)
  • An industry category (Pick one that fits)
  • Your time zone (Central Time)

Once you have your web property created, you will be assigned a Tracking ID by Google. This Tracking ID is all you will need to connect your WordPress blog.

Write down your tracking ID and open a new tab. Navigate to your WordPress blog and sign in.

3. Configure the MonsterInsights plugin

Now we will configure the MonsterInsights plugin in WordPress (If you don’t have this plugin, you’ll need to install it into your version of WordPress).

For UNI Digital Advertising students, this plugin is pre-installed for you – you can find it by clicking on “Insights” at the bottom of the left navigation menu.

You’ll have to authenticate your Google account to be able to configure Google Analytics to track your blog and to access your web property from WordPress.

Authentication involves signing in to your Google Account and pasting the authentication code into the MonsterInsights dialog box, then clicking “next”.


Once you have pasted the code and clicked “next”, you’ll choose the web property you want to associate with your WordPress blog. Choose the web property you just set up.


Cool – Google Analytics should be tracking your blog now!

4. Confirm that Google Analytics is Working Correctly

This is a fun one – kind of the equivalent of looking in the mirror to see if you’re really there.  Go back to Google Analytics and select the “Real Time” clock icon on the left hand navigational menu.

Click on the Real-Time “Overview”.  Now open a new browser tab and navigate to your blog url (the one you are trying to track).  Once your blog’s home page loads up, go back to Google Analytics tab and look at the real time overview report.  You should see this:

Nice work.  You’re watching yourself read your own blog.  This proves that it works and that everything is set up correctly.  You’re done – go do something fun, like find animated GIFs of people clapping!


If you see 0 active users – something is not right.  Go back to step three.

Update: You can also use the excellent Google Tag Assistant Chrome plugin or the Ghostery browser extension to check to ensure that the Google Analytics code is properly working.


Are Blog Posts Read via RSS Feed Readers Tracked by Google Analytics?

A great question came up in class today: If someone reads your blog post through an RSS reader, will their activity be tracked by Google Analytics?

Photo by Robert Scoble

First of all, let’s be sure you understand what an RSS feed is and how it is “read” by RSS readers.

This is the icon for an RSS Feed
(design by Stephen Horlander)
.

An RSS feed is an XML document that contains the raw data contained in your blog posts in a structured format that can be easily read and displayed in other applications.  The default setting on Blogger blog is to allow RSS feeds, so there is nothing special you need to set up.  

You can view the RSS file for the class blog at: https://digital.uni.edu/feeds/posts/default?alt=rss

Note that this text file contains tags to describe the blog:

<title> The title of the blog
<description> The blog description
<link> The blog URL
<managingEditor> The editor of the blog’s content

It also includes each blog post that has been published on your blog enclosed in <item> tags. 

<title> The title of your post
<description> The body text of your post (including HTML tags and links)
<link> The URL of your blog post
<author> The author of the blog’s content 

This allows other applications (like Feedly) to download the RSS file and “re-publish” the posts.  But does Google Analytics track the user activity of viewers who are viewing the site via a Feed Reader?  The answer, according to Google, is unfortunately no.

Google’s Analytics support page states:

Tracking visits from RSS feeds
In order for Google Analytics to track data, it is necessary that the Google Analytics tracking code gets executed. Since most RSS/atom readers cannot execute JavaScript, Analytics will not count pageviews that are loaded through an RSS reader. Analytics requires that the visitor execute a JavaScript file on Google’s servers in order to track that pageview.

Since an RSS feed reader only downloads and displays the contents of the RSS file, and not the actual HTML and JavaScript code of the blog itself, Google Analytics cannot track pageviews of blog posts read in RSS feed readers.

Setting up Google Analytics to track your Blogger blog

Today I saw a few Tweets by some #unidigadv students who were having trouble with their social media setup.

Trying to finish up my project setup, fun but confusing #unidigadv
— Aaron Willis (@MMA_Marketer) January 29, 2013

#unidigadv Help! Trying to set up google analytics and I have no clue what I am doing.
— Caitlin Hanken (@CaitlinHanken) January 29, 2013

To make life a little easier for you, I just bought an awesome screen recording tool called iShowU, which will allow me to give you a quick tutorial on how to create a Google Analytics account and set it up to start tracking your Blogger blog. 

Hope this helps – I recommend watching in fullscreen mode so you can read the text. Good luck and enjoy!